Transform your client onboarding from a manual headache into a seamless, professional experience that runs completely on autopilot. We are going to show you the true power of integrating multiple Zoho Applications! We demonstrate our complete one click client onboarding process. From a single button click to a fully signed agreement stored in WorkDrive.
Zoho CRM
This is the engine that manages our automation inside Zoho CRM we will need to configure a few items.
First off we need to have a picklist field on the Account record to manage out workflow actions called Onboarding Status with the values 'Started', 'Details Received' & 'Completed'. I personally like to store the primary contact details in a field on my account (First Name, Last Name, Email and Mobile).
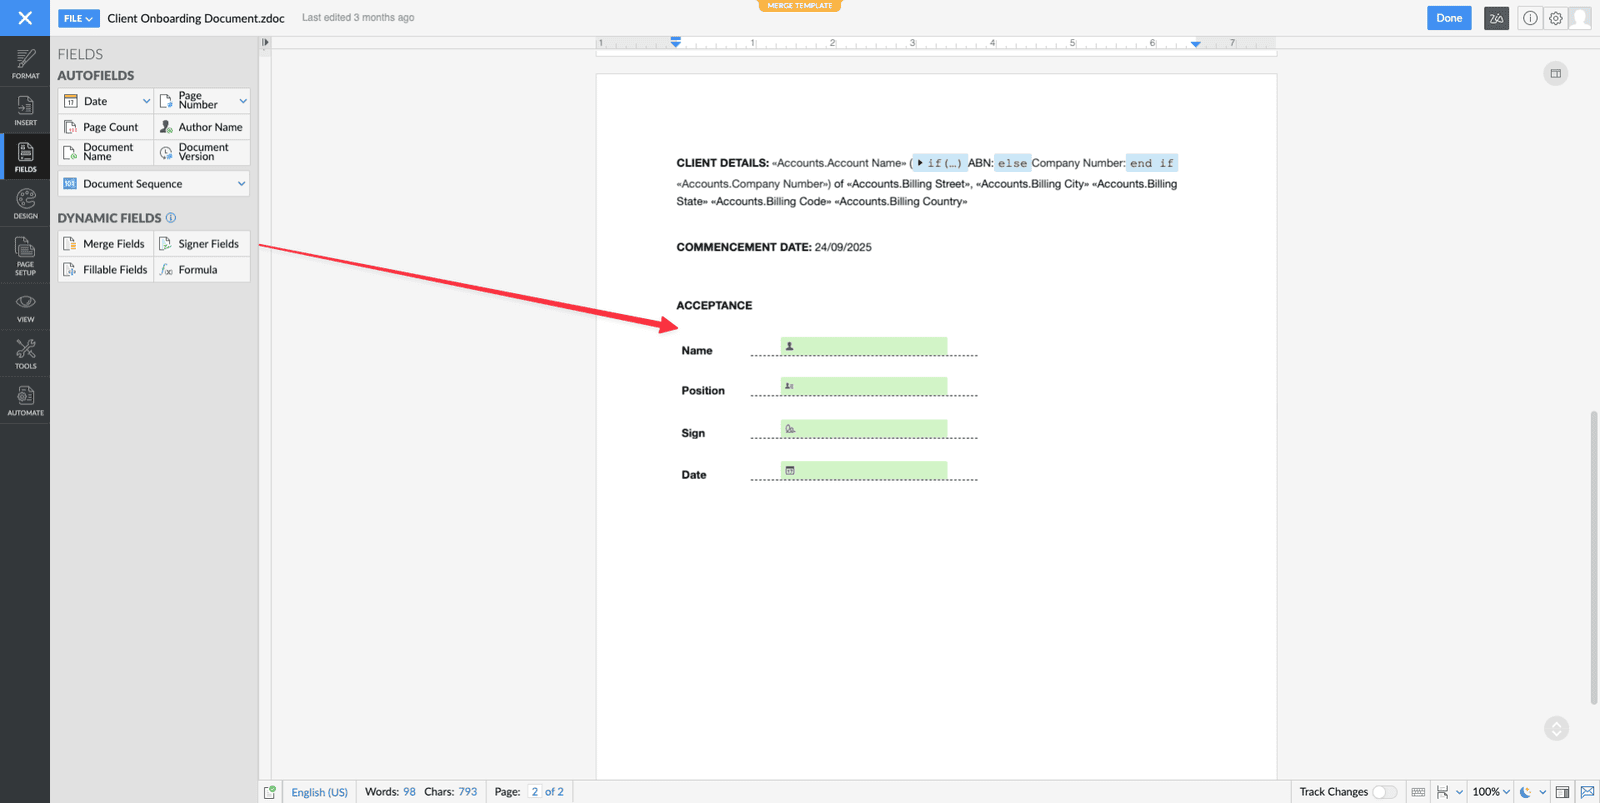
Configure your agreement template within Zoho CRM mail merge templates (Settings > Templates > Mail Merge) that pulls in the clients data that will be added to the template. Don't forget to configure the Signer Fields so Zoho Sign knows exactly where they need to sign [Screenshot Below].
Ensure that you have enabled the Zoho Forms and Zoho Sign integration connected (Settings > Marketplace > Integrations > Zoho). You will need to use the default installed 'Send With Zoho Sign' Button on the Account record once with your mail merge template so it creates its connection with CRM.
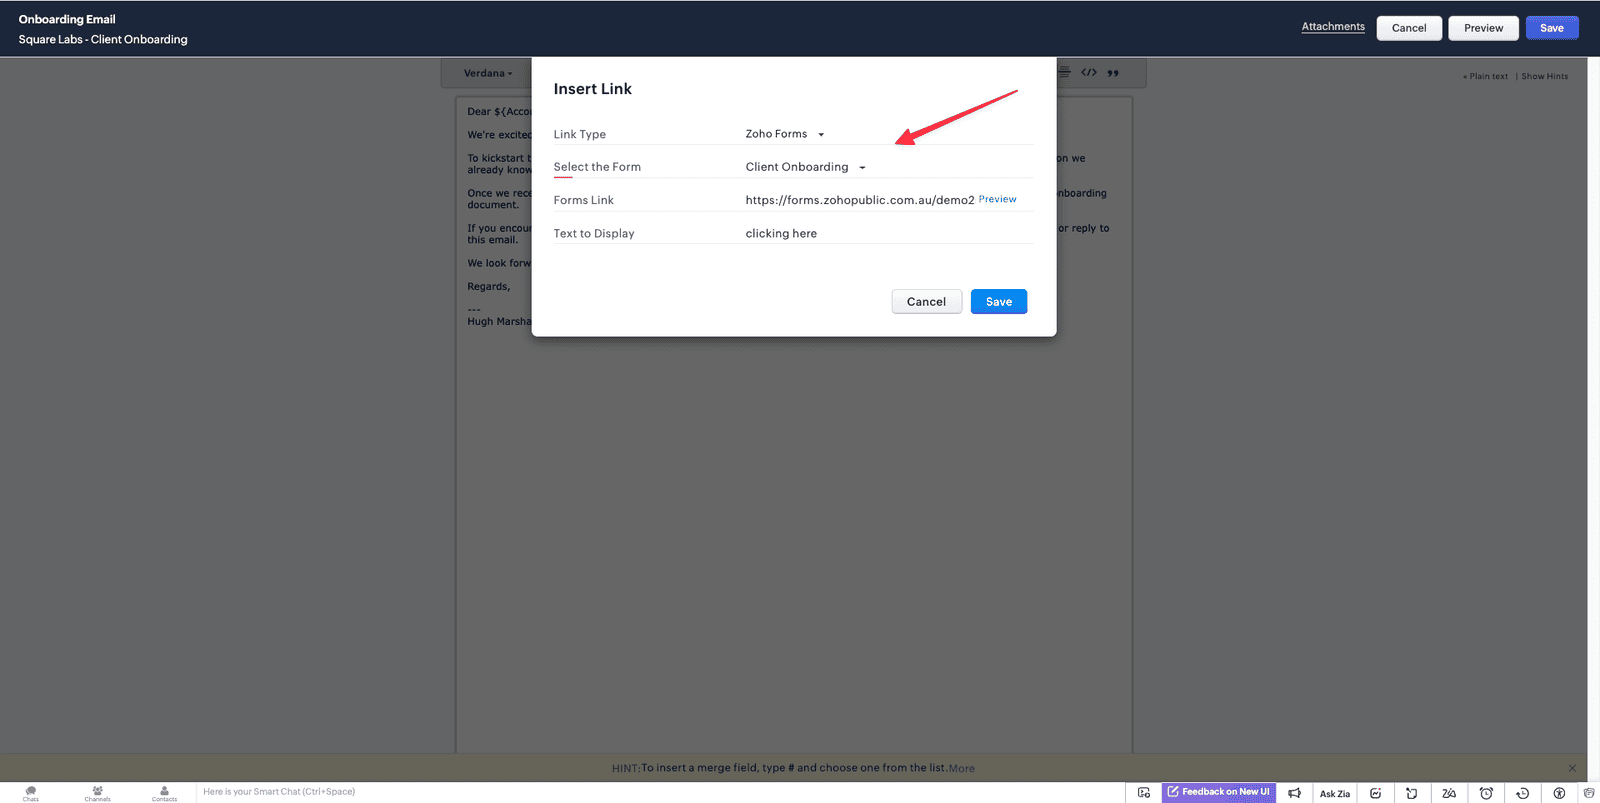
Configure your email template and include a link that is of the type 'Zoho Forms' and select your onboarding form [Screenshot Below].
Before creating the custom functions make sure you create a custom connection called 'crm_connection' (Settings > Developer Hub > Connections) and you will need to select Zoho Oauth and include the following scopes:
- ZohoCRM.modules.ALL
- ZohoCRM.settings.mailmerge.CREATE
- WorkDrive.files.ALL
- ZohoWriter.Merge.ALL
- ZohoWriter.documentEditor.ALL
- TeamDrive.files.ALL
- ZohoSign.documents.ALL
Configure your two workflows [Screenshot Below].
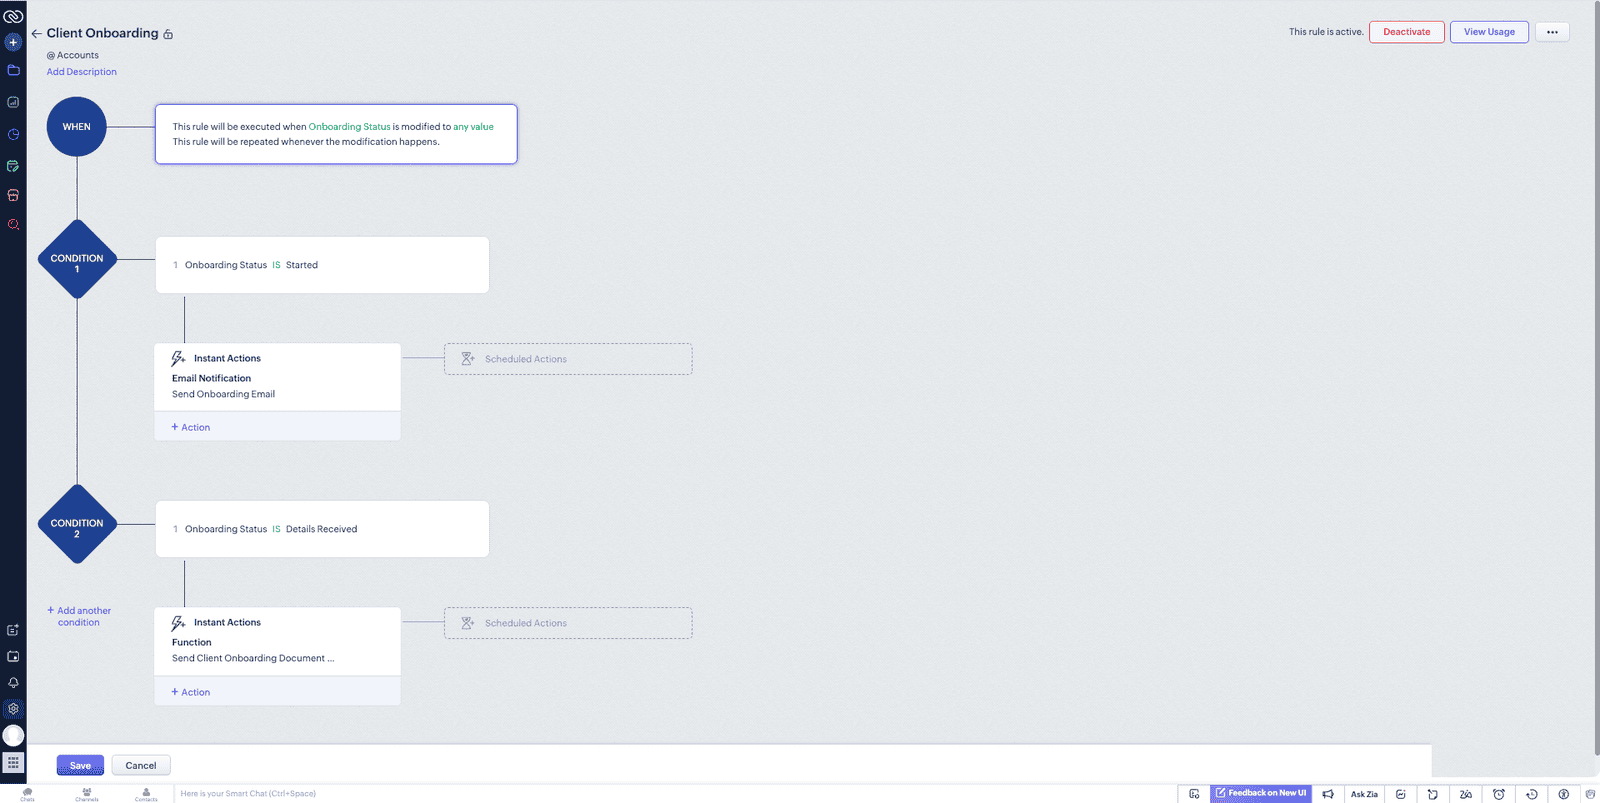
- Client Onboarding (Accounts module) that triggers on update of the Onboarding Status field on the Accounts Module. The first condition will be set to Onboarding Status IS 'Started' to send the onboarding email template. The second condition will be set to Onboarding Status IS 'Details Received' trigger the custom function 'Send Client Onboarding Document Via Zoho Sign' [Code Below].
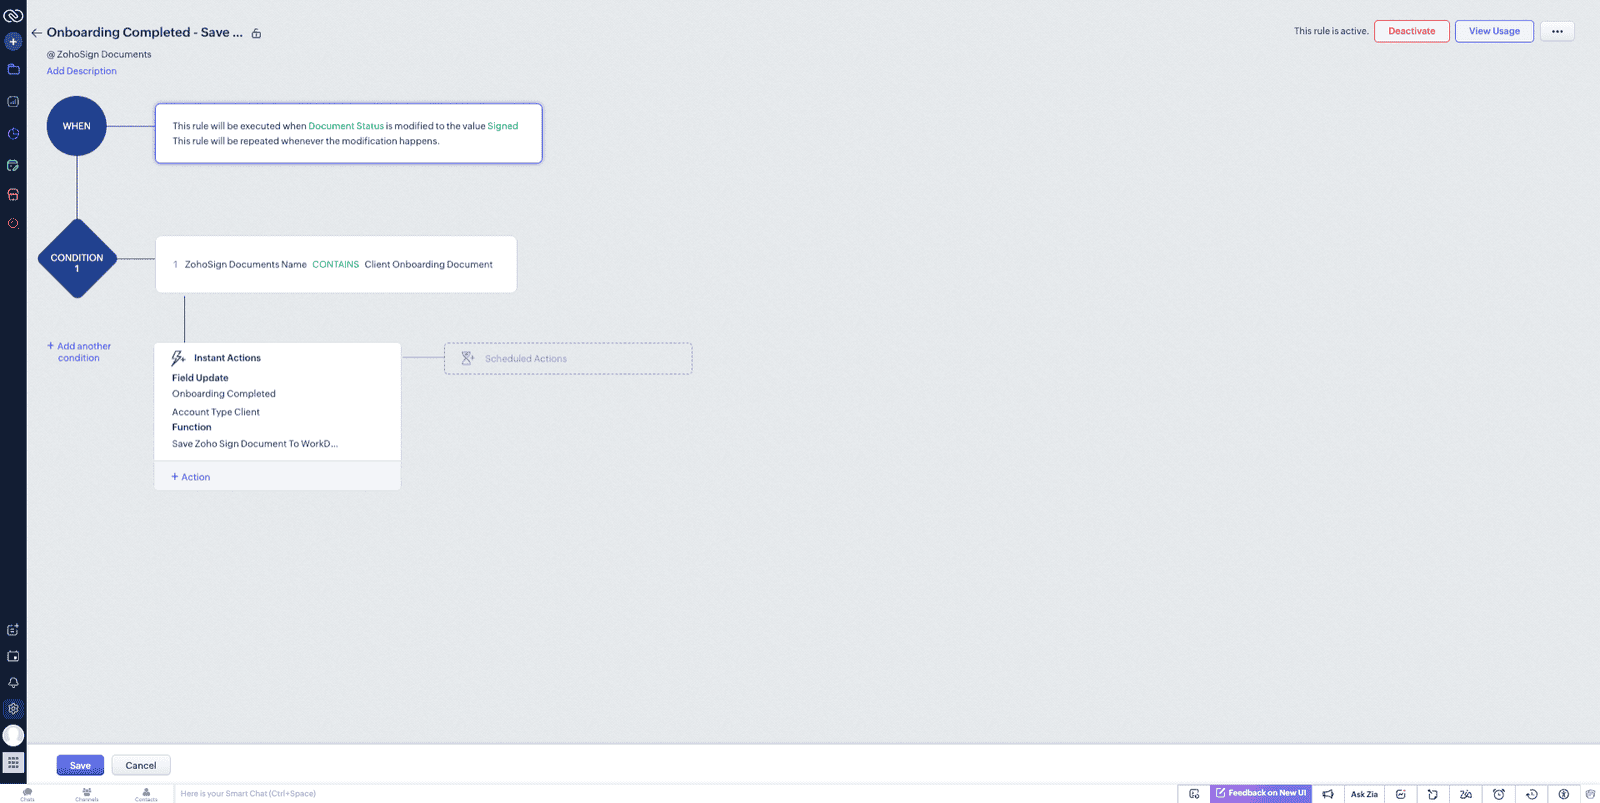
- Onboarding Completed (ZohoSign Documents module) that triggers when the Document Status is modified to the value 'Signed'. It will have a single condition of ZohoSign Documents Name Contains 'Client Onboarding Document' or whatever you call you template. This will then use field updates to update the Onboarding Status to 'Complete', Client Type to 'Client' and trigger the final function 'Save Zoho Sign Document to WorkDrive' [Code Below].
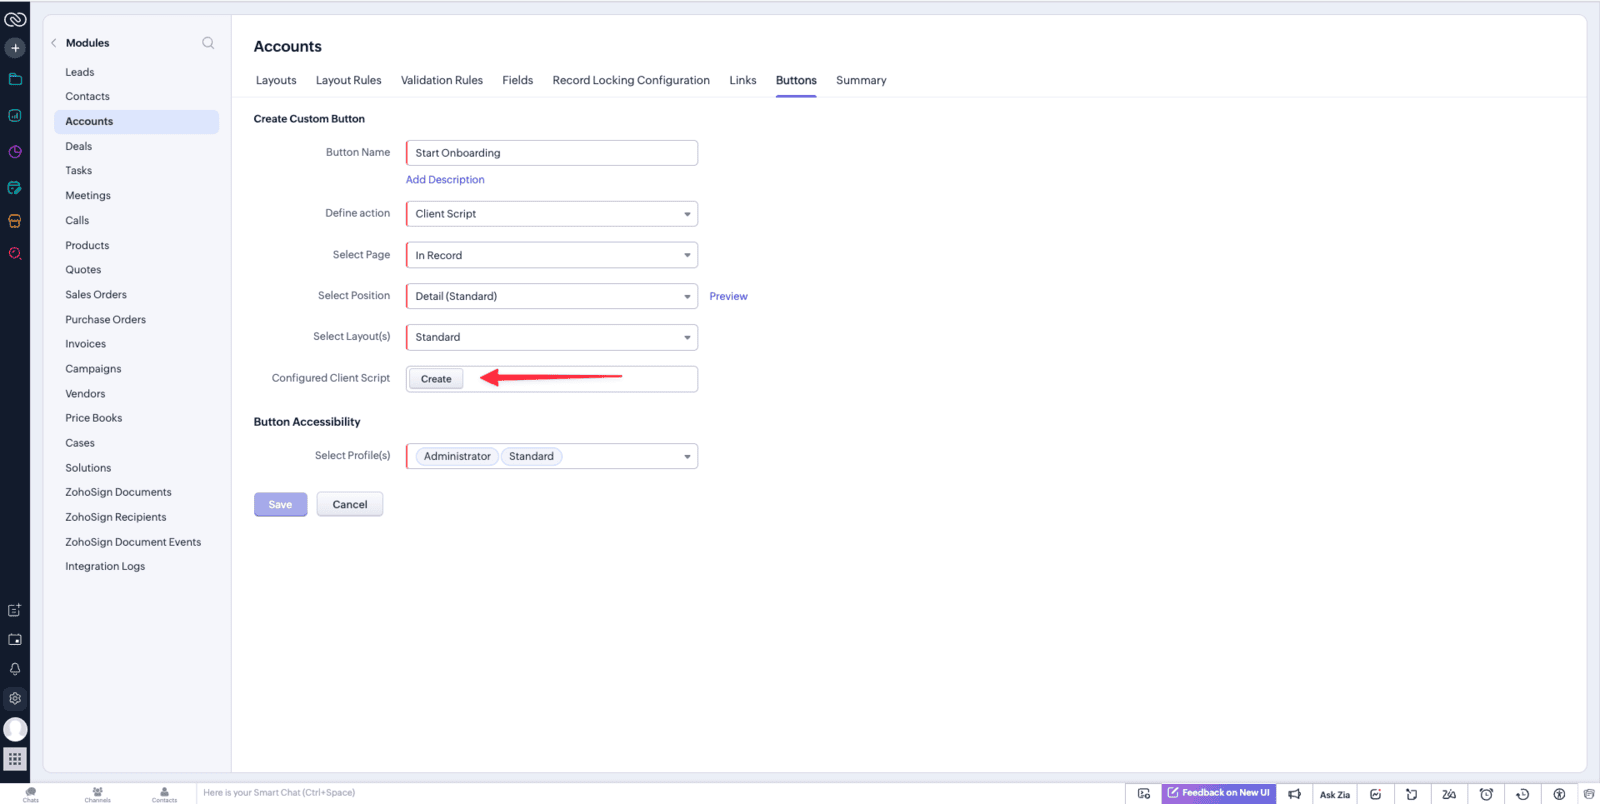
Configuring the button is optional as the workflow triggers of the Onboarding Status field being updated to 'Started' but I like a button as the Onboarding Status field for me will eventually be dropped to the Admin Fields section I have and potentially hidden so I don't need to see it. To configure a client script button we need to go to Settings > Modules & Fields > Accounts > Buttons > Create New Button [Screenshot & Code Below].
Screenshots
Code Examples
Zoho Forms
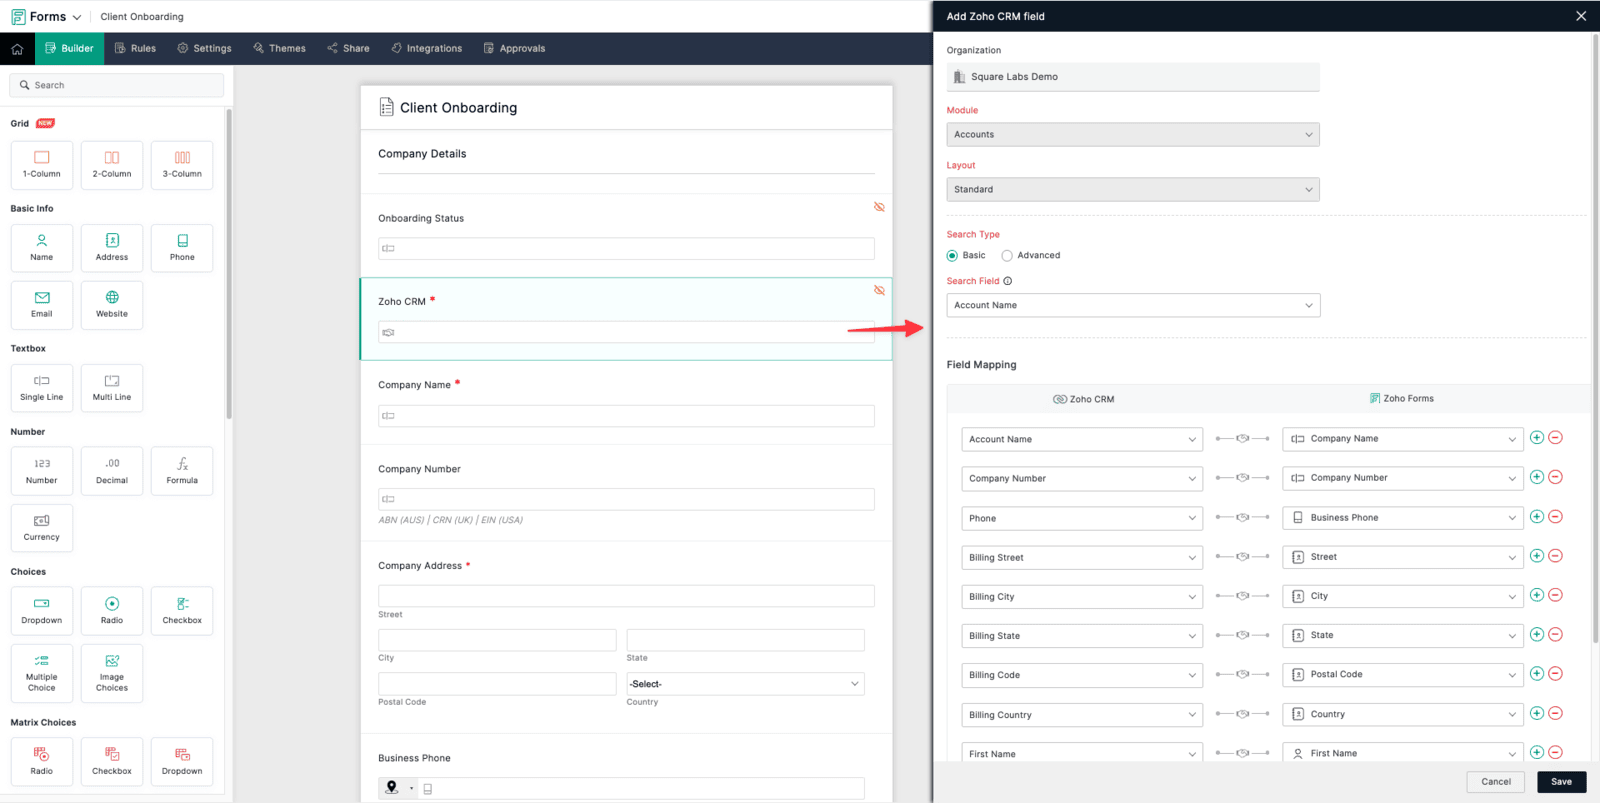
In Zoho Forms you will need to create a form that collects all of the information you require from your new client along with the contact information.
Ensure that you have the following fields:
- Onboarding Status (Hidden & Initial value set to 'Details Received')
- Zoho CRM Field connected to the Accounts Module (Optional - Map known data into the Form)
- Contacts Email Field (Disabled)
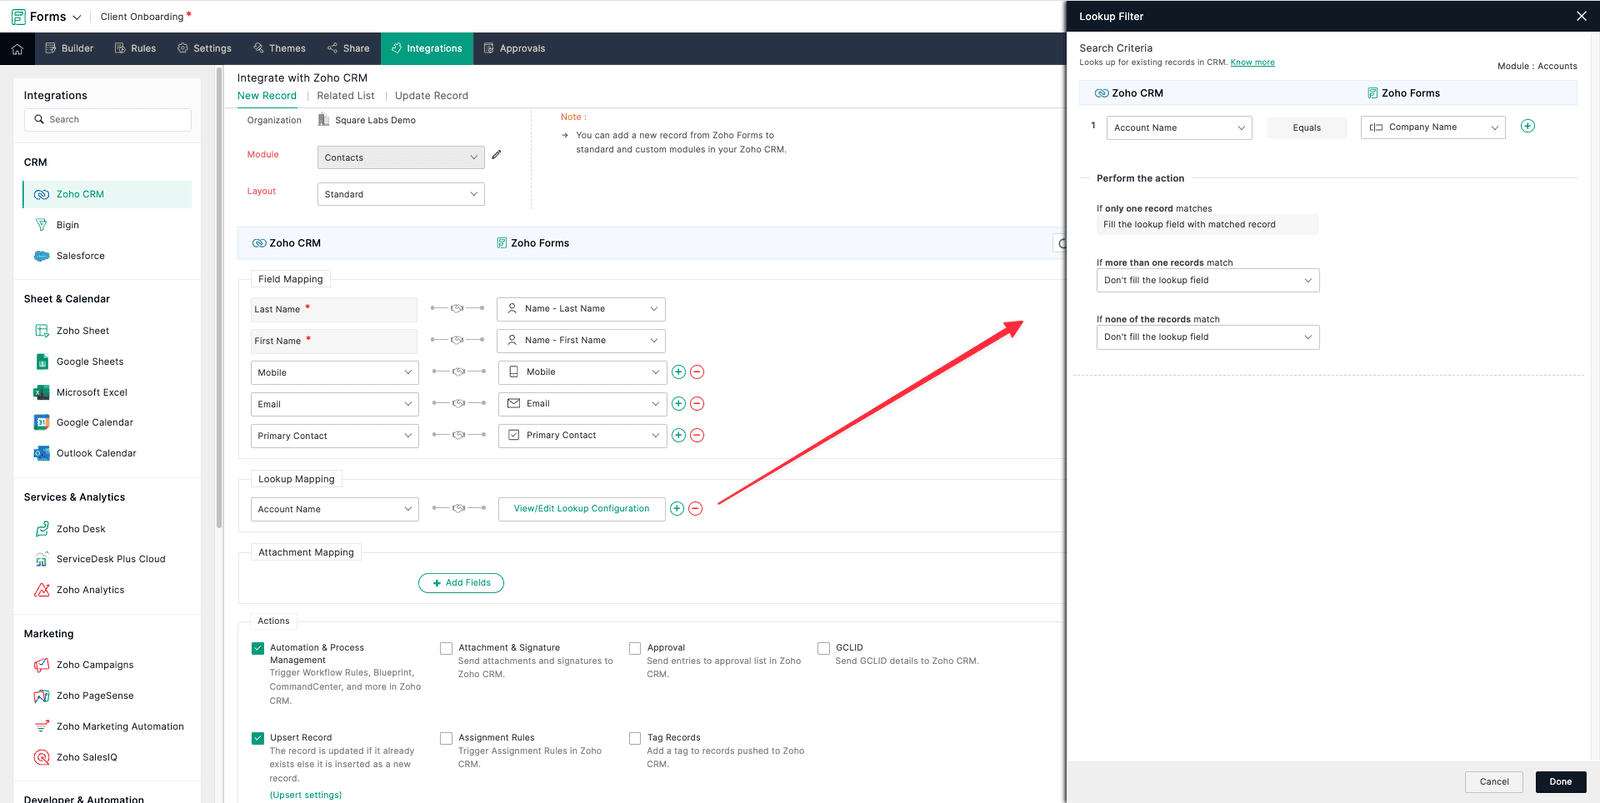
- New Record - Contacts (Lookup Mapping: Account Name)
- Related List - N/A
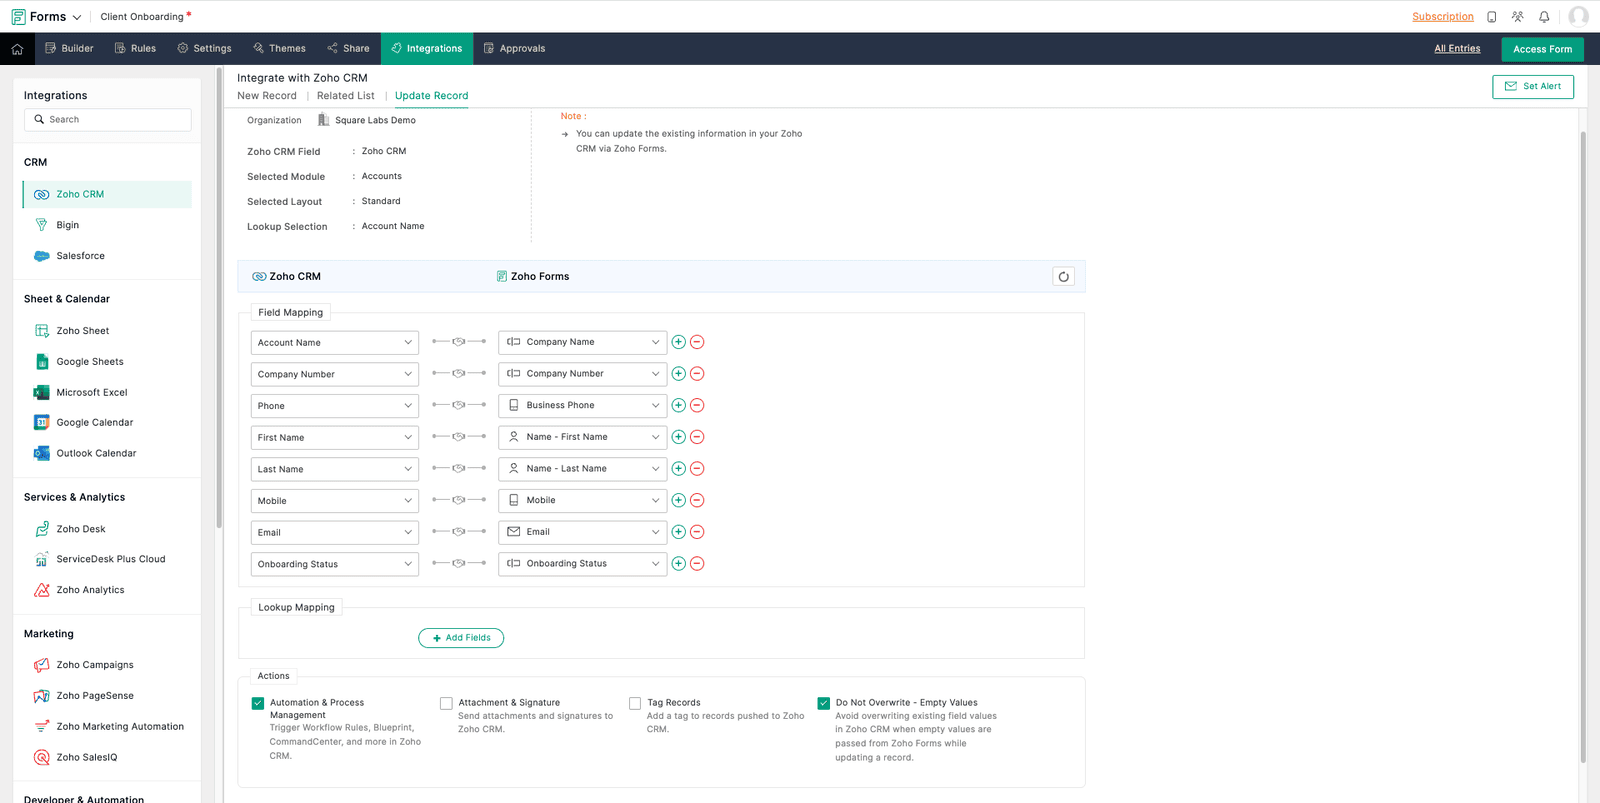
- Update Record - Accounts
Zoho Sign
There isn't too much to configure inside Zoho Sign but to ensure this looks professional I would suggest you update the following:
- Organisation Name & Logo (Settings > Branding > Organisation details)
- Organisation Email Address (Settings > Branding > Organisation details)
- Email Templates (Settings > Branding > Email Templates)
- Domains & DKIM (Settings > Account Settings > Domains)
Zoho WorkDrive
This step is optional however if you are wanting to store the signed document in Zoho WorkDrive you have two options.
- Save to Generic Folder
- Save to Account Specific Folder
If you are saving this to a specific Client Folder you will need to ensure that you have setup some sort of client folder automation and store the Accounts WorkDrive Folder ID on their Account record in Zoho CRM.
If you are looking to configure automated client folders checkout out our other blog article or video.