ZOHO MARKETPLACE | CRM EXTENSION
Auto Document Merge Lite Guide
Explore the step by step guide on this page to start merging documents with ease.
For additional support, contact us at: extensionsupport@squarelabs.com.au
Setup Guide
01
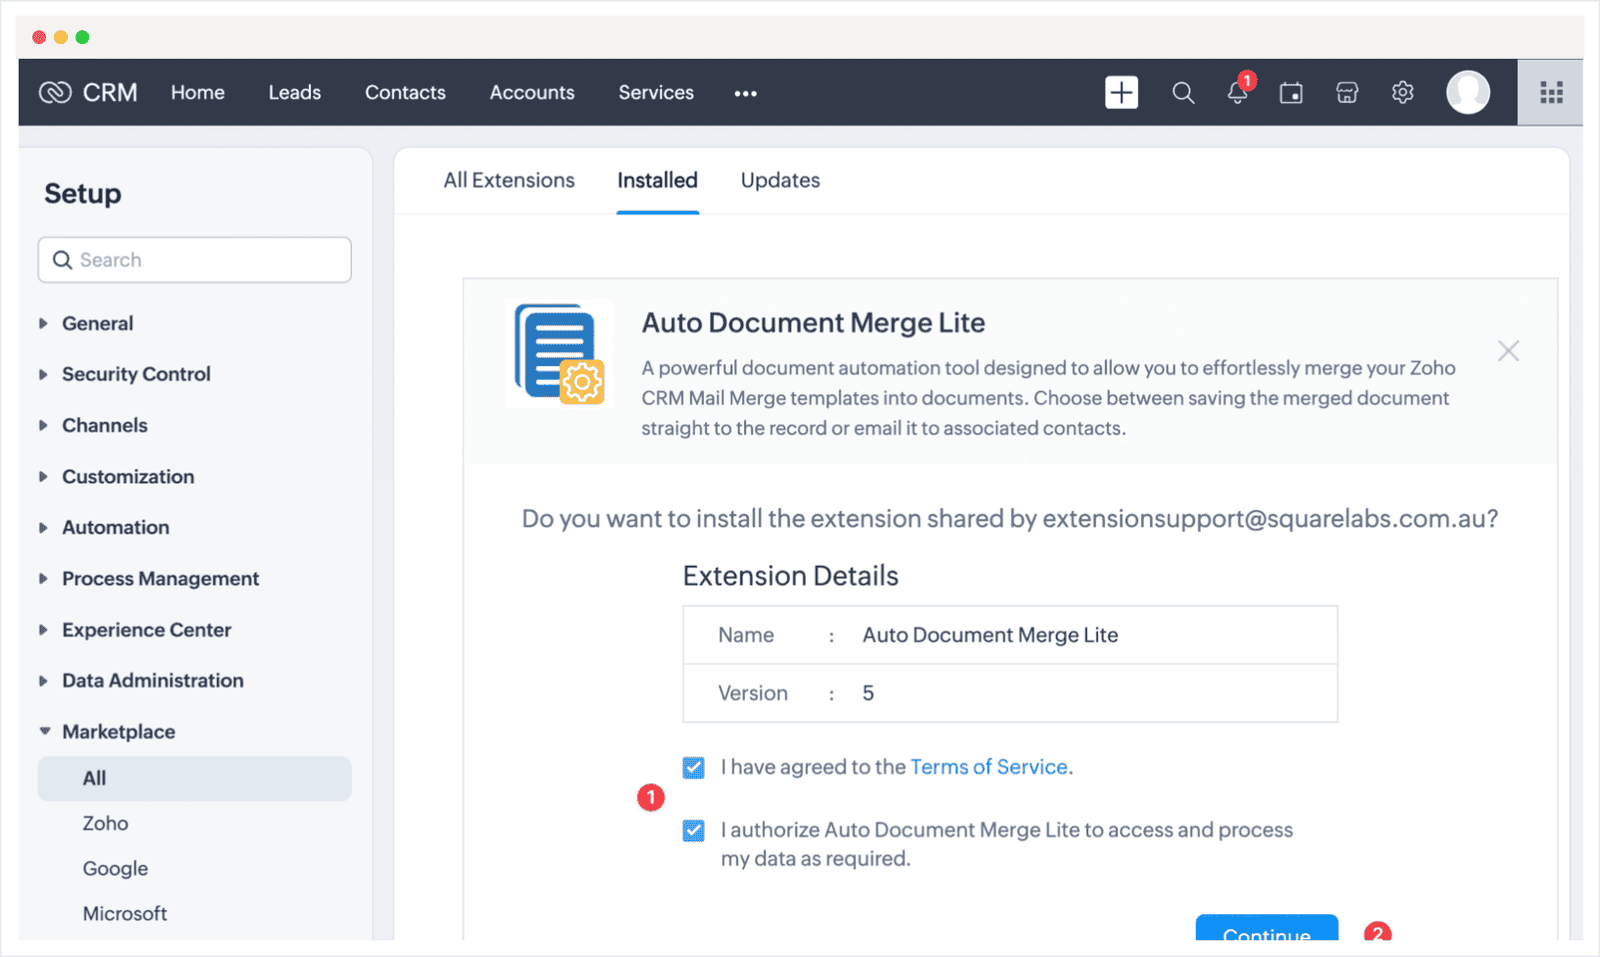
Simply follow the install link in the email to access the installation screen. Once there, you can agree to the terms of service and data processing permissions. You can go to the next stage by clicking the 'Continue' button.
02
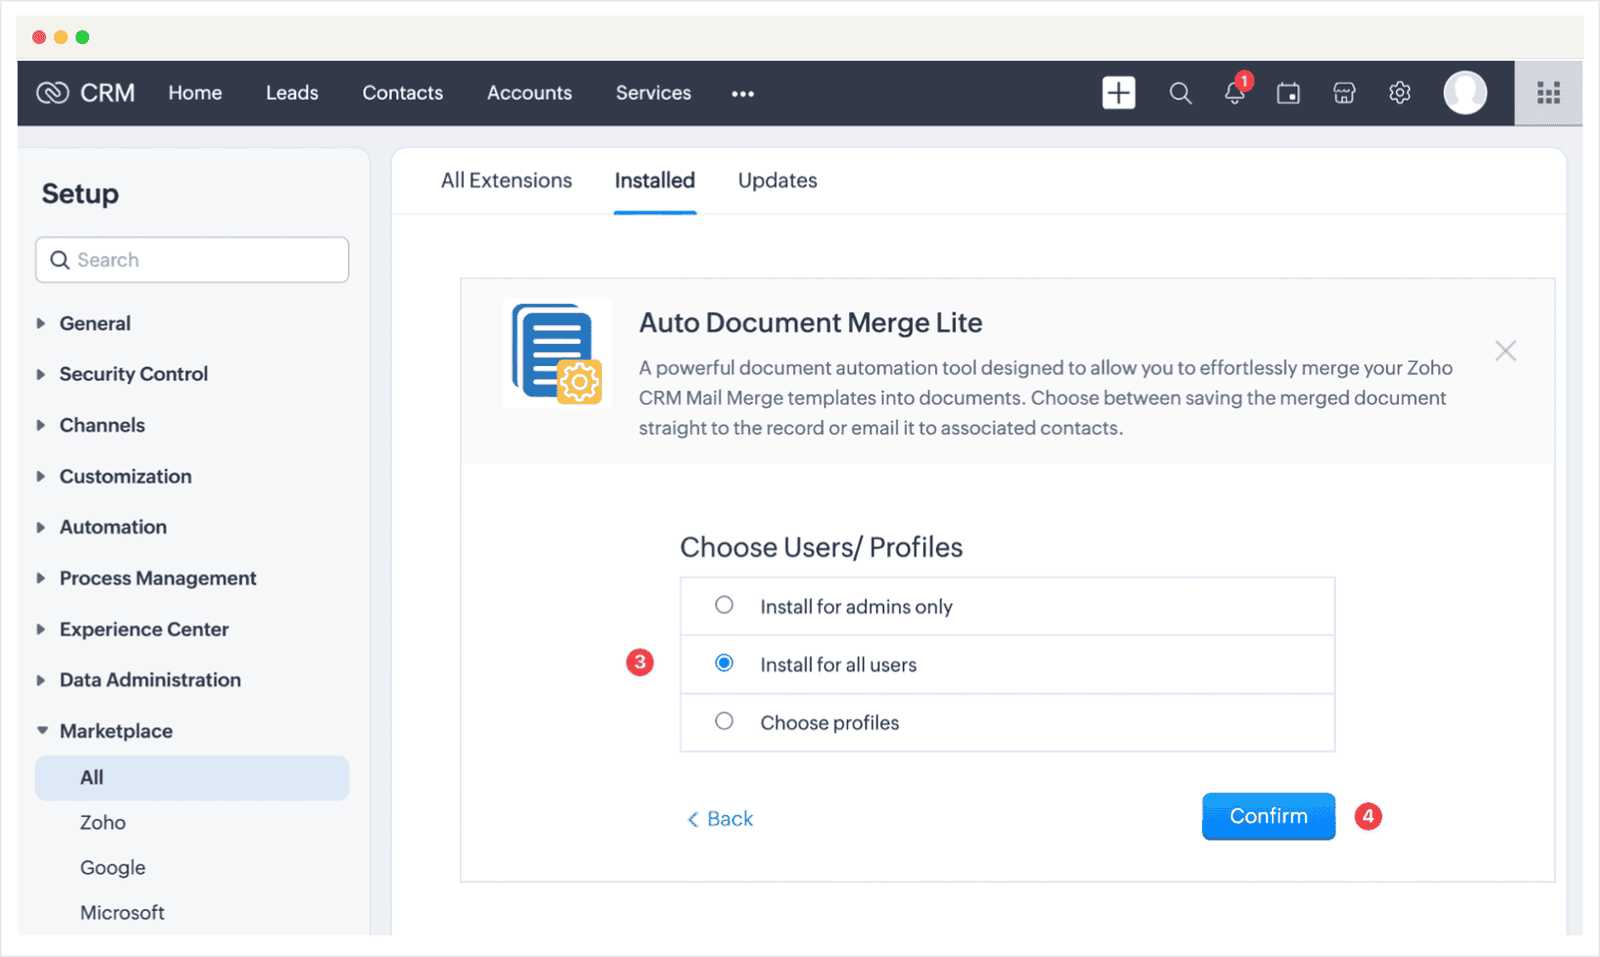
Select which profiles will have access to the extension and click the 'Confirm' button.
03
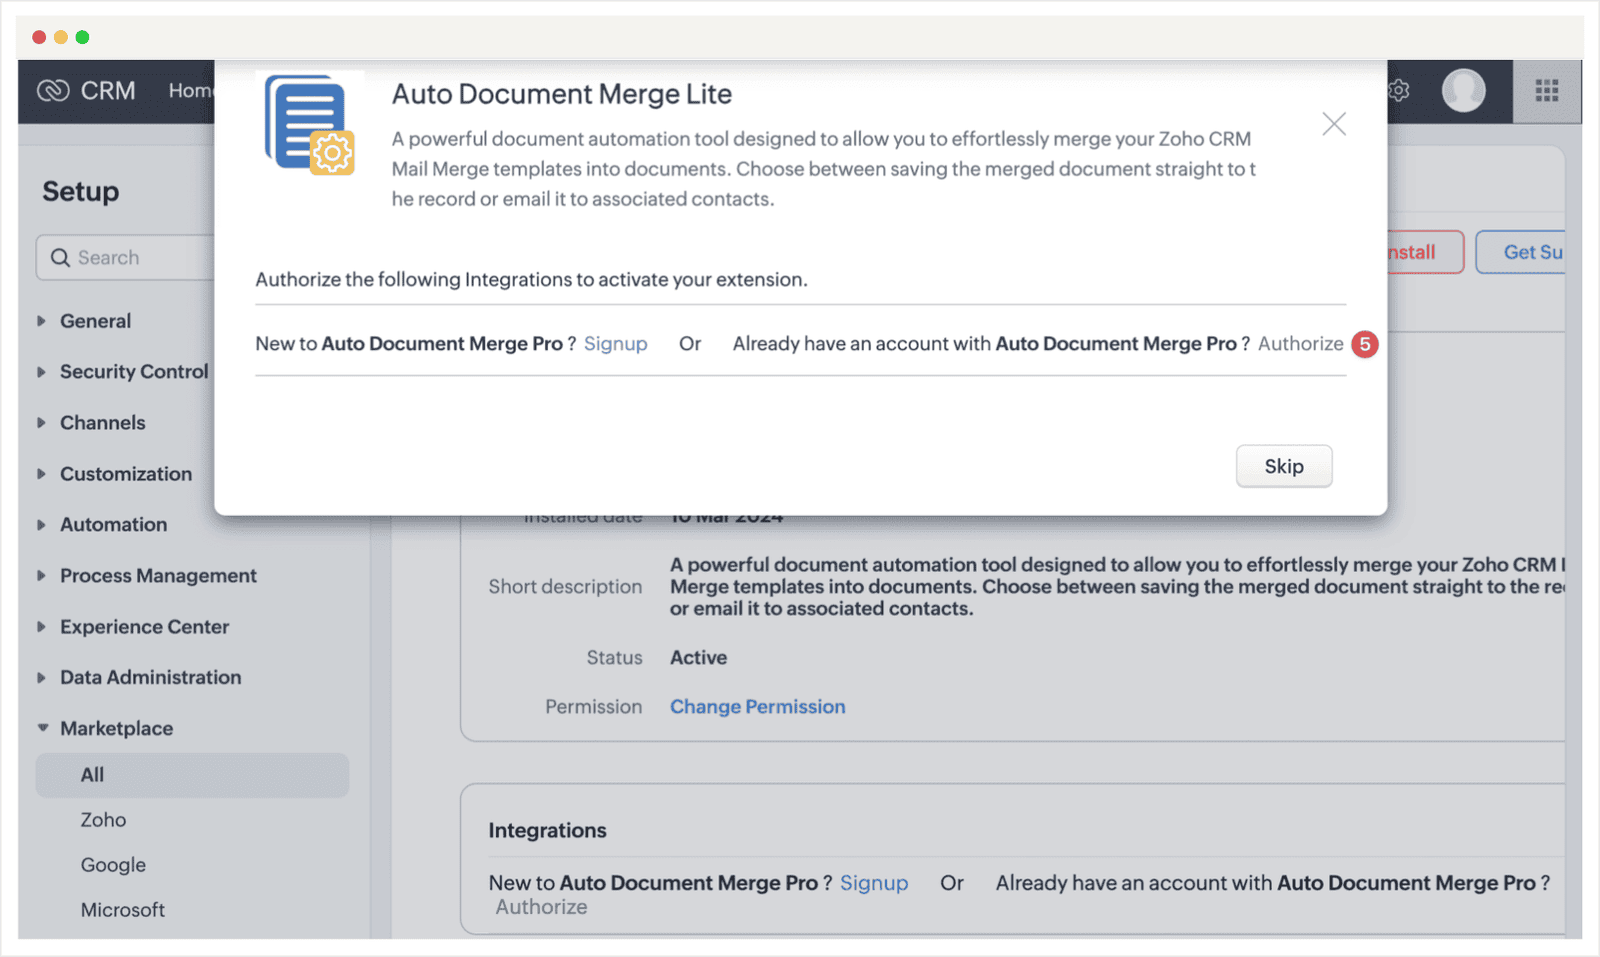
Once the installation has completed you will be prompted to authorise the extensions connector. Click the green 'Authorize' button and a popup will appear.
04
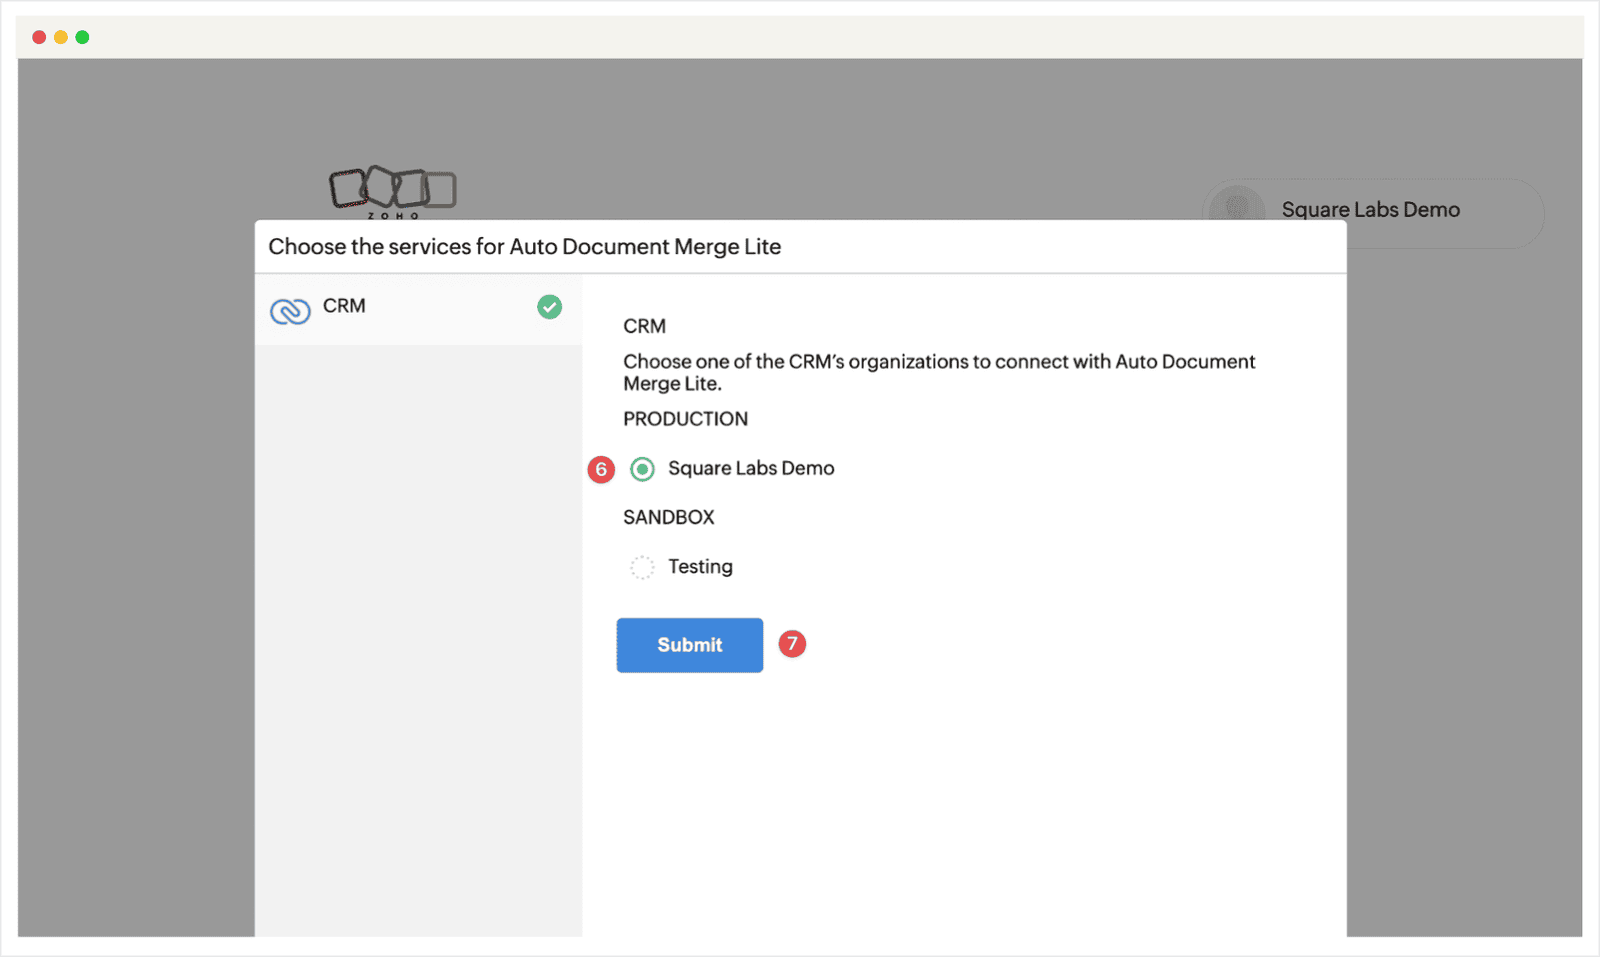
In the popup, select the production account or the Zoho CRM organisation that you are installing the extension into followed by the 'Submit' button.
05
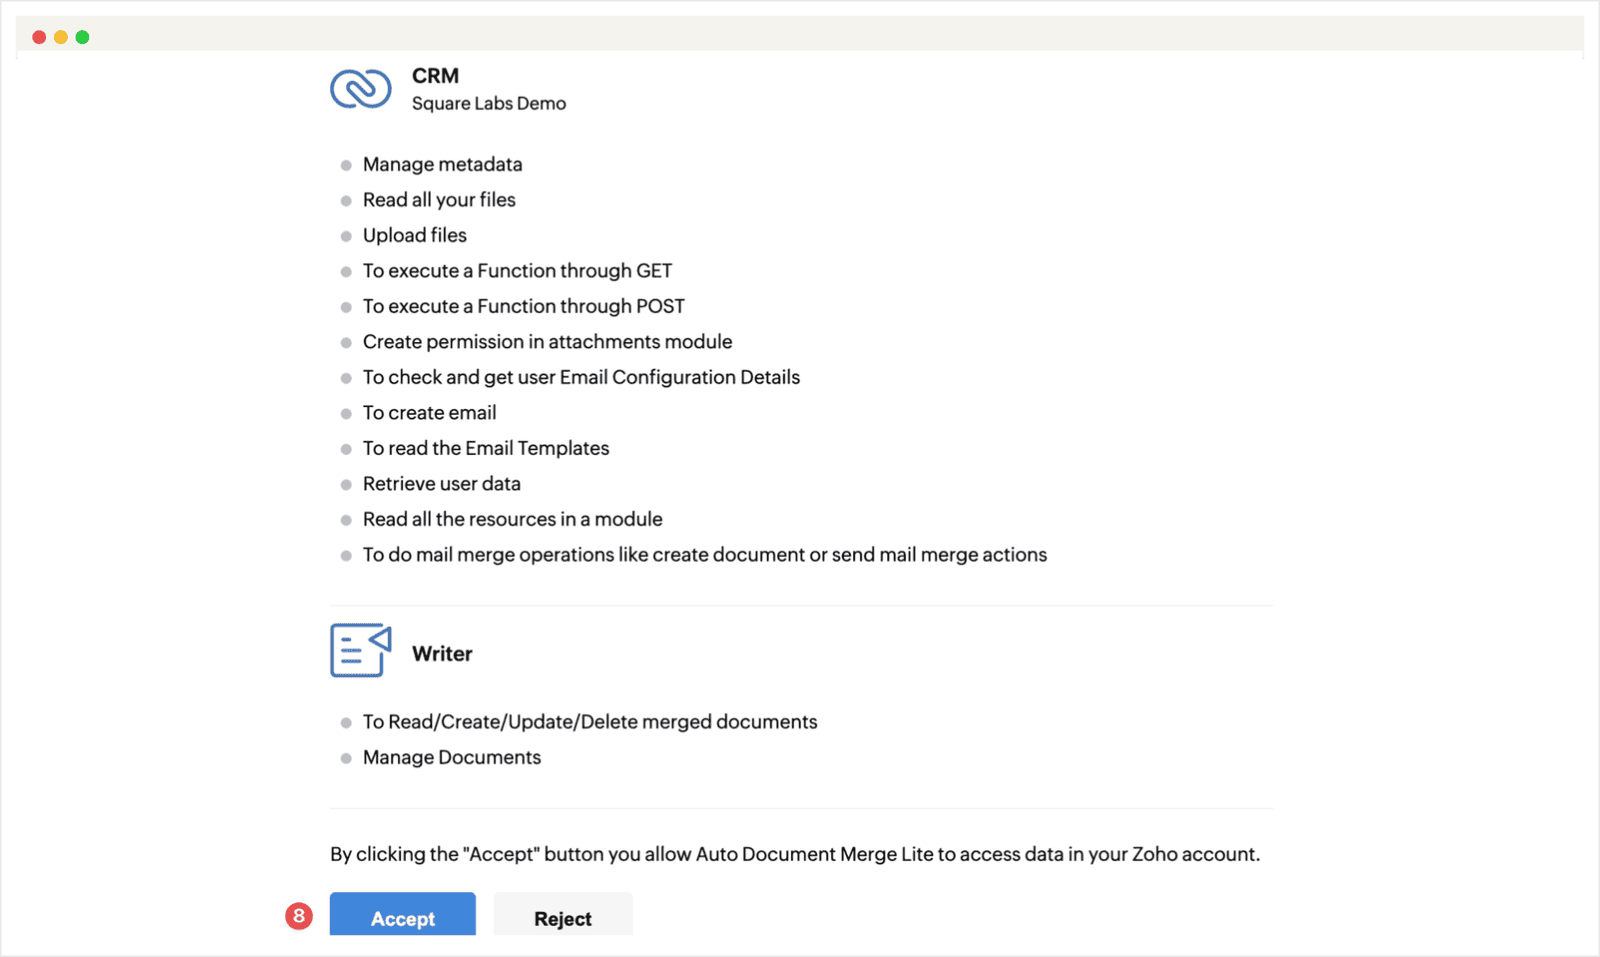
On the next screen you can review the API scope actions that the extension requires to perform the document merges and click the 'Accept' button.
06
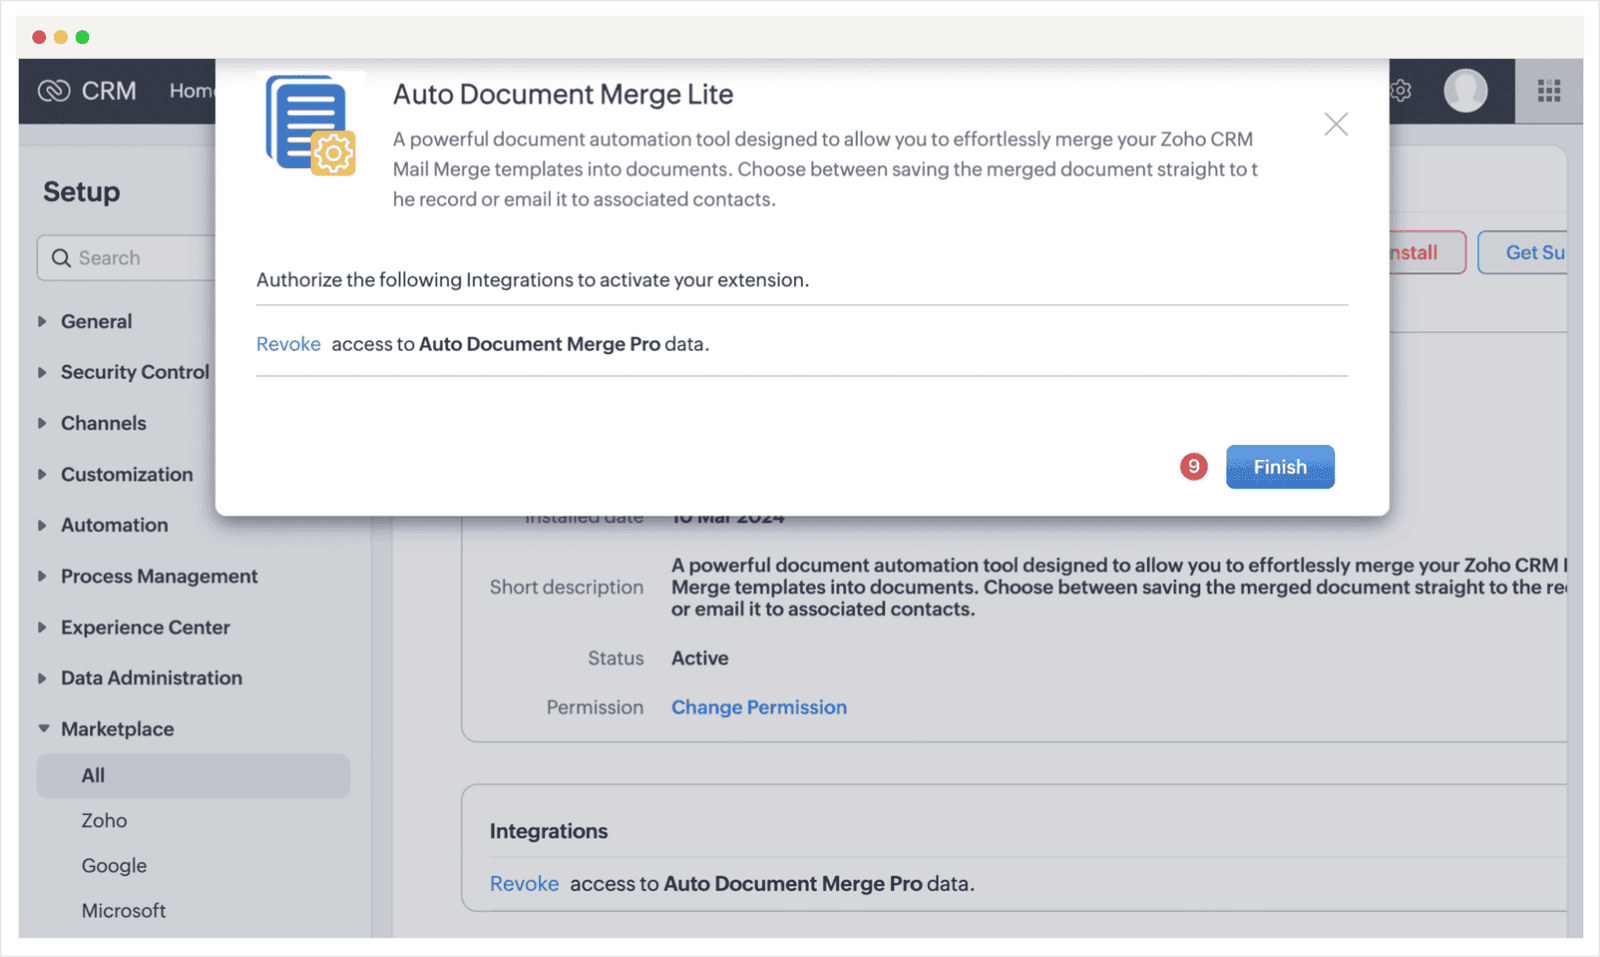
The popup will close and you will be redirected back to the connector where you can click the 'Finish' button and you will be redirected again to the extensions settings page.
07
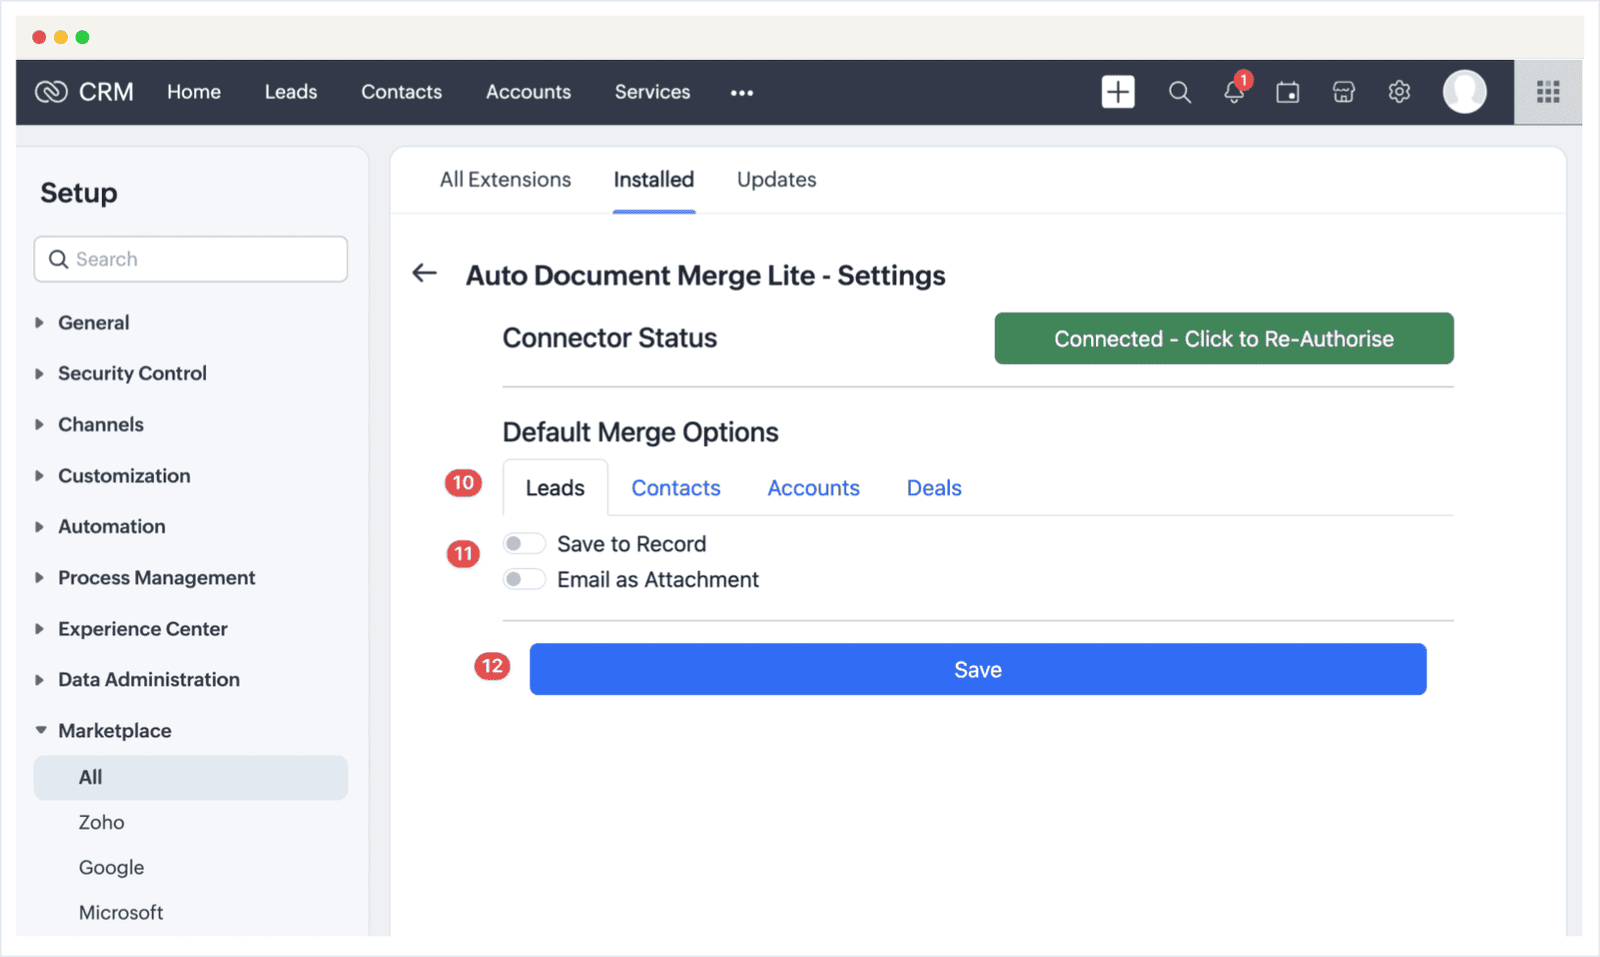
In the extension settings page you can choose to default the merge options for the 4 included modules. This ensures that these options will be pre checked when opening the extension to save you time. Once you are happy with your defaults click the 'Save' button.
08
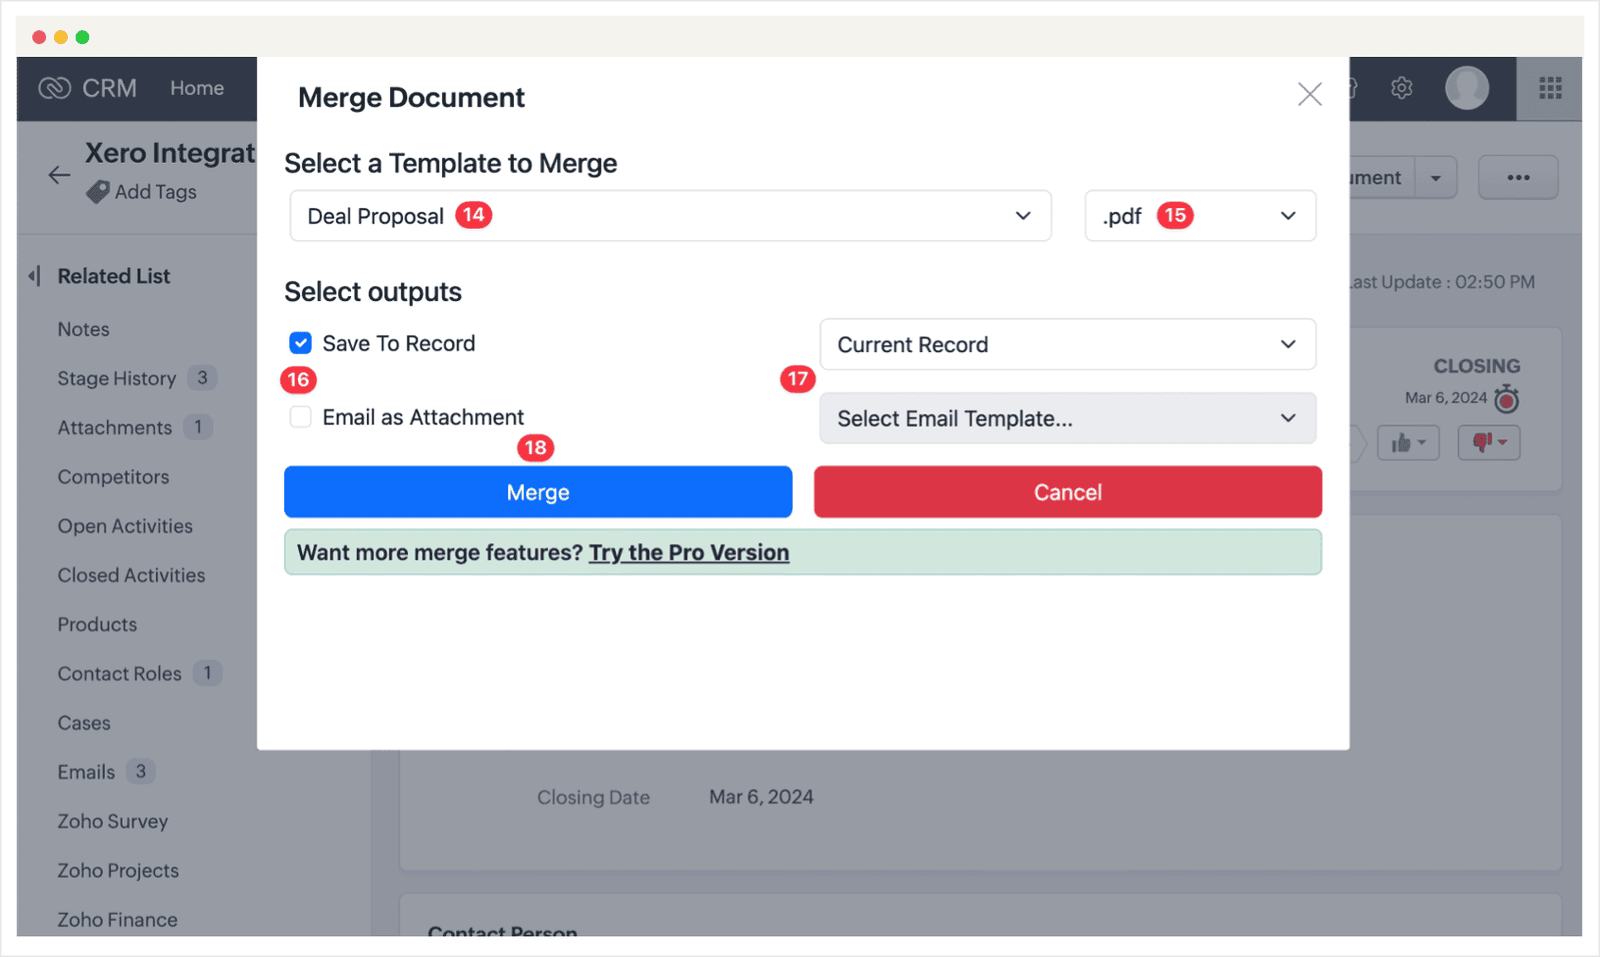
You will encounter a loading screen while the merge is underway.
09
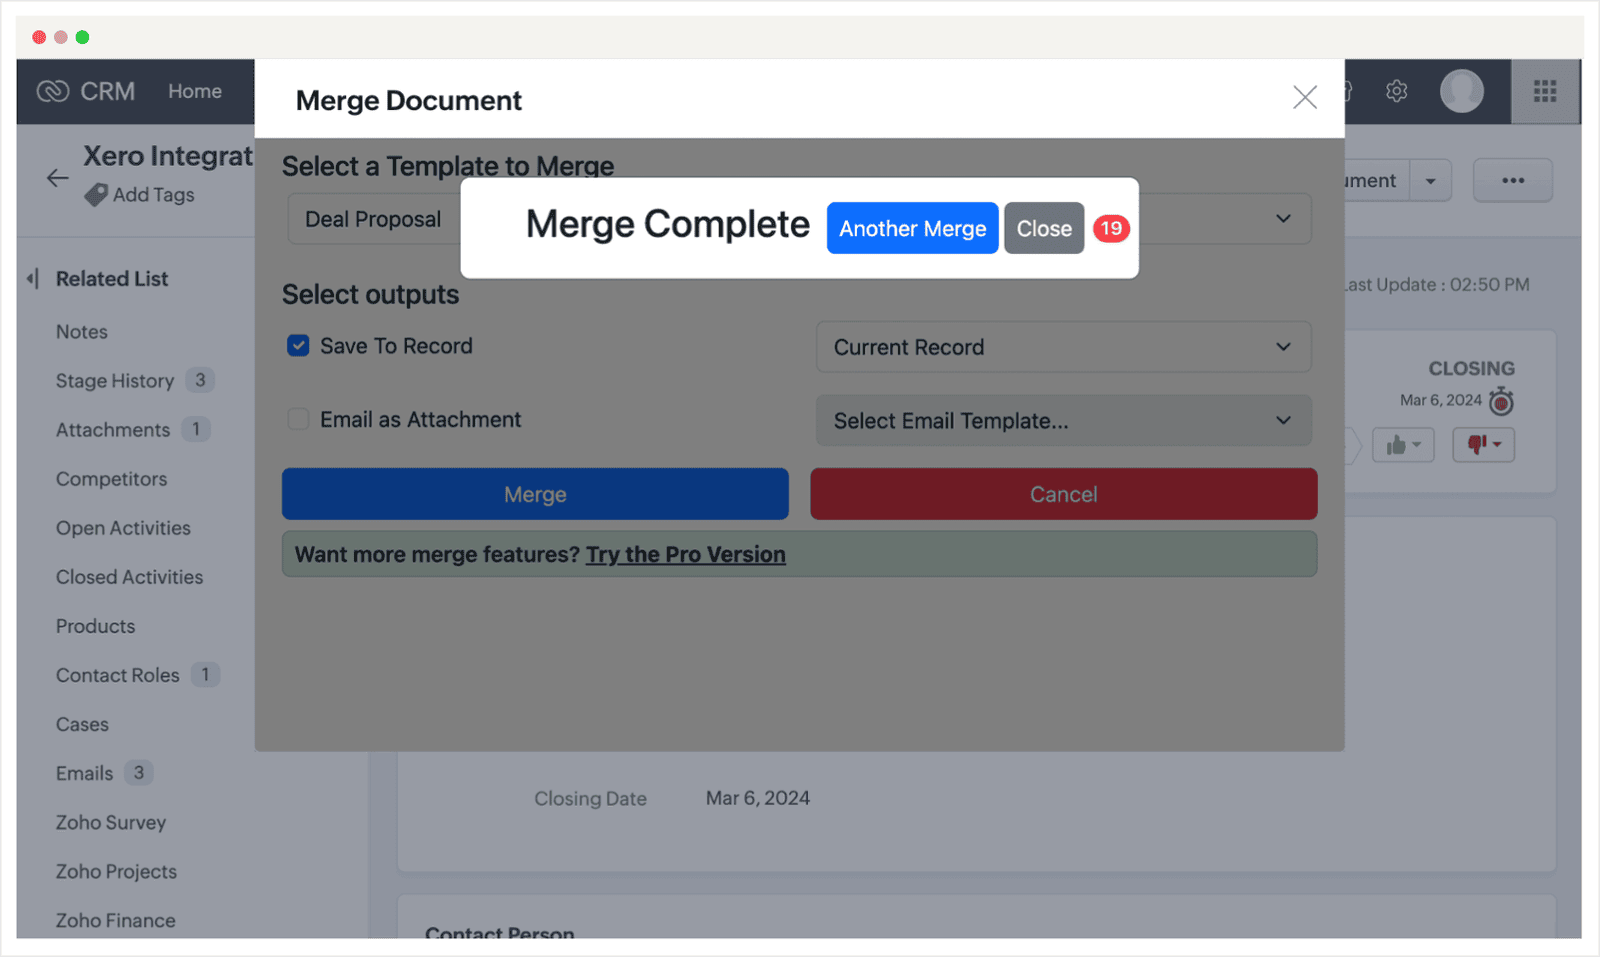
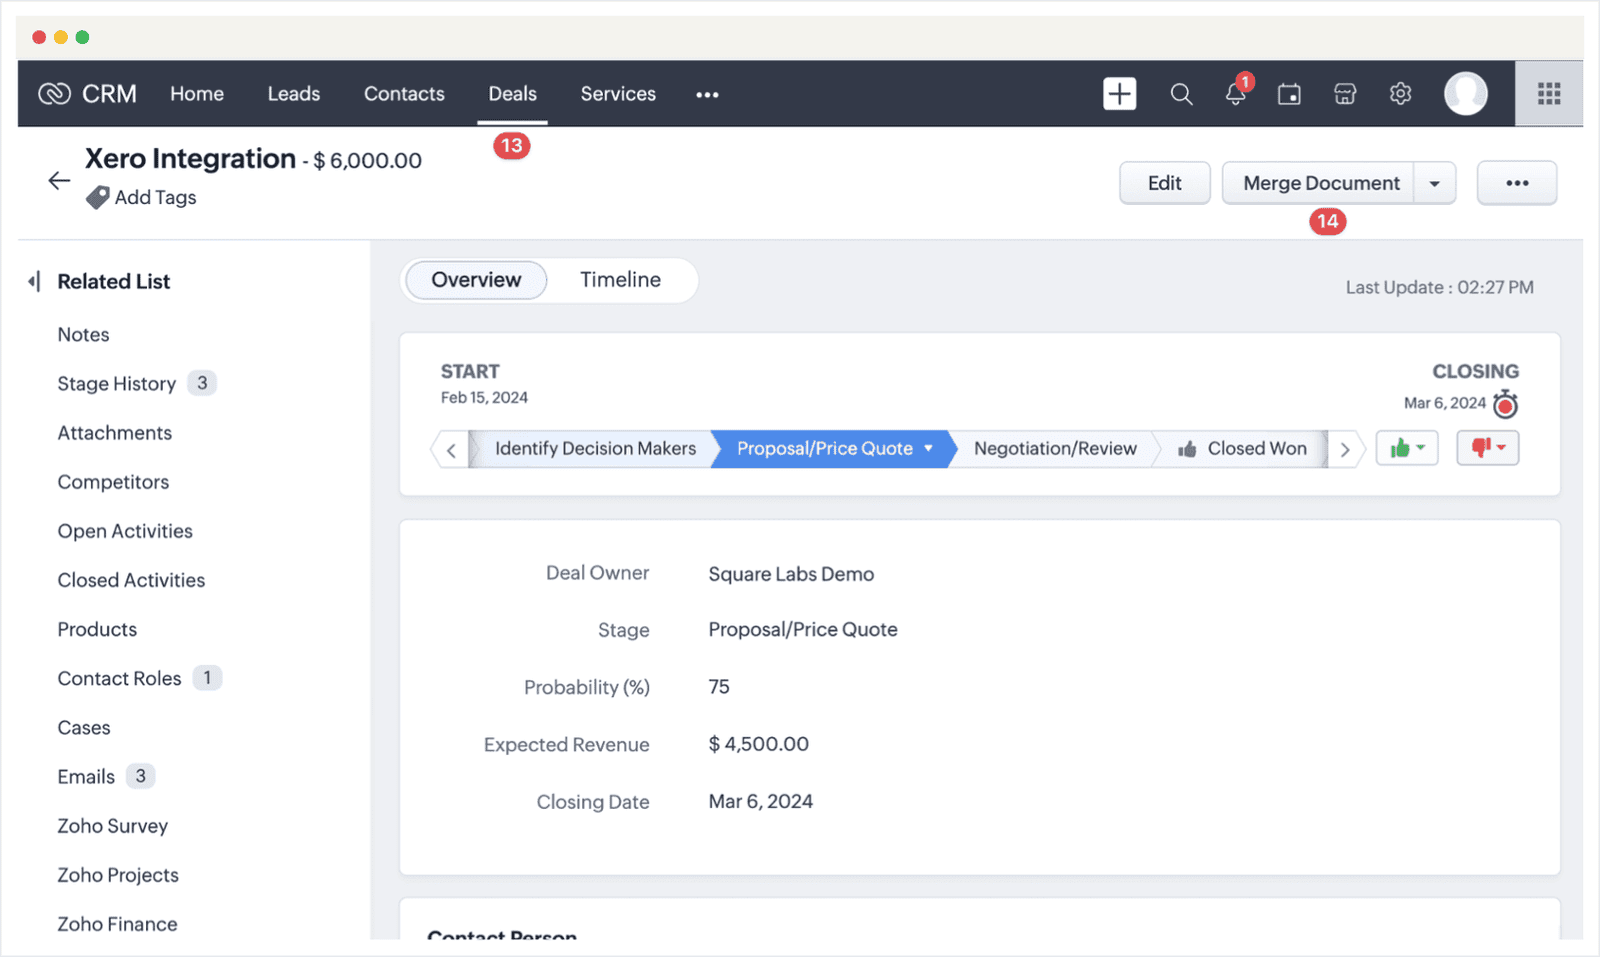
Once the merge is complete you will be able to select 'Another Merge' to perform another merge for this record or 'Close' to close and refresh the record.
10
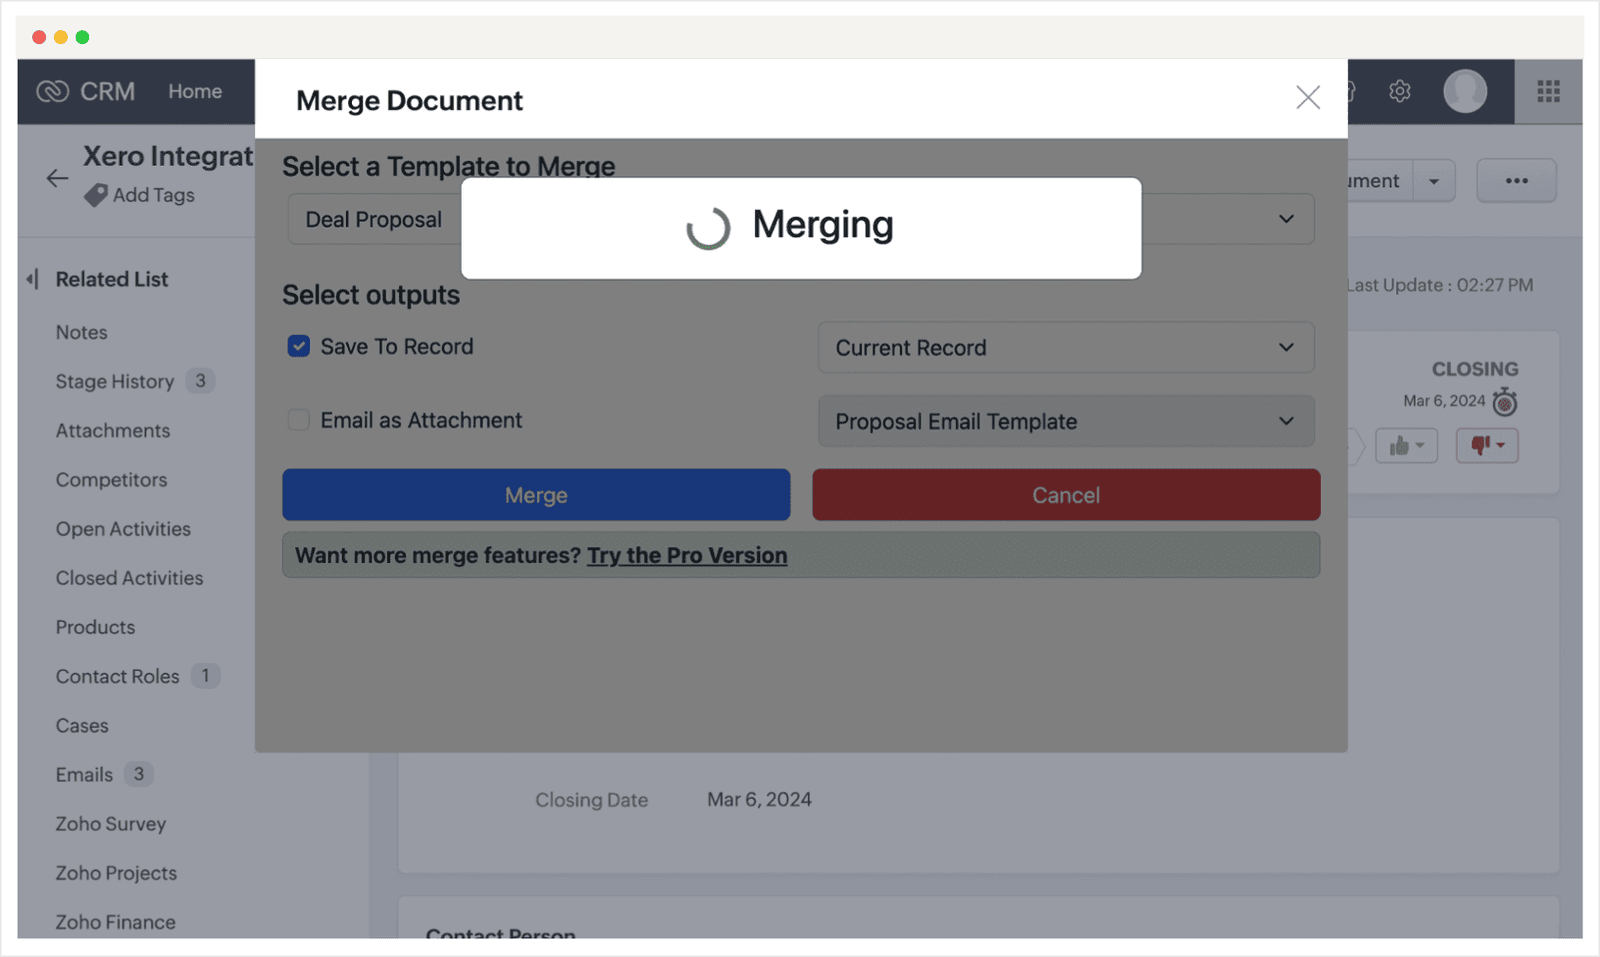
You will encounter a loading screen while the merge is underway.
11
Once the merge is complete you will be able to select 'Another Merge' to perform another merge for this record or 'Close' to close and refresh the record.