Video Guide
Install
Settings
User
Workflow
Custom Module
Install
Install Guide
- Navigate to Zoho Marketplace, Search for "Auto Document Merge for Zoho CRM", or click this link.
- Start a Free Trial and follow the procedure.
- Once installed, it will redirect to the Setting Page of Extension.
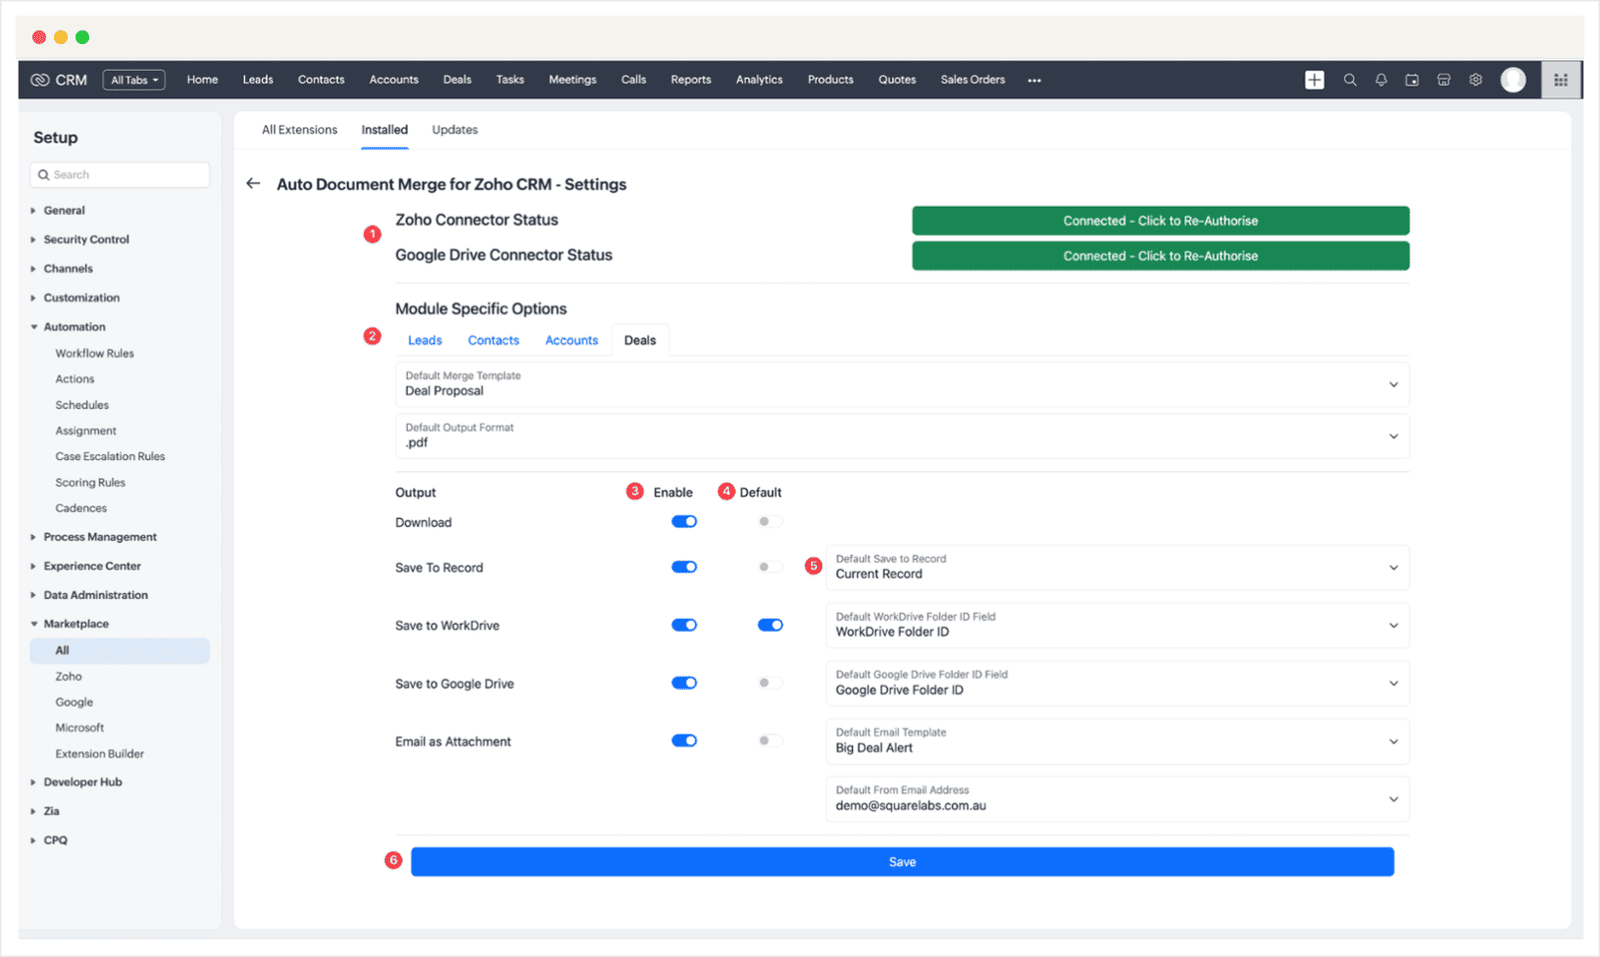
Settings
Settings Guide
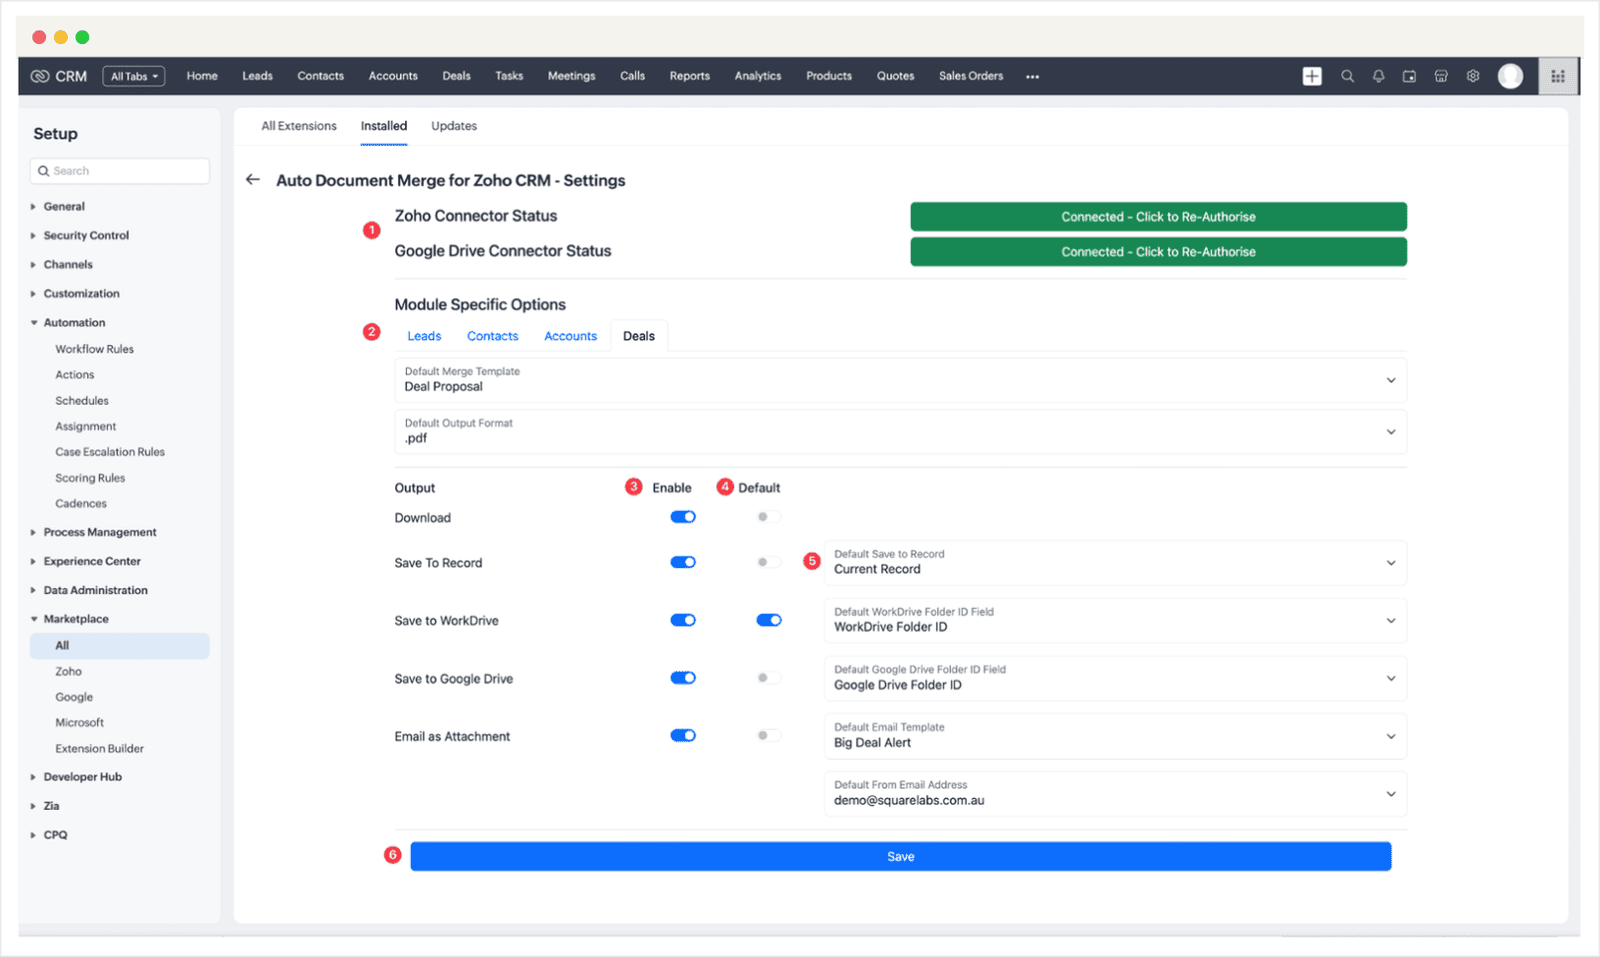
- The Zoho Connector is required for the extension to function however the Google Drive Connector is only required if you want to save your merged documents to a Google Drive Folder.
- Module specific settings enable you default the merge template, format, output types and defaulted options.
- Enable or Disable merge output types.
- If you use a particular output type the most you can set it as a default so it is pre-selected when loading the widget.
- Some outputs have additional options that you can default to save you having to select them each time.
- Save your settings.
User
User Guide
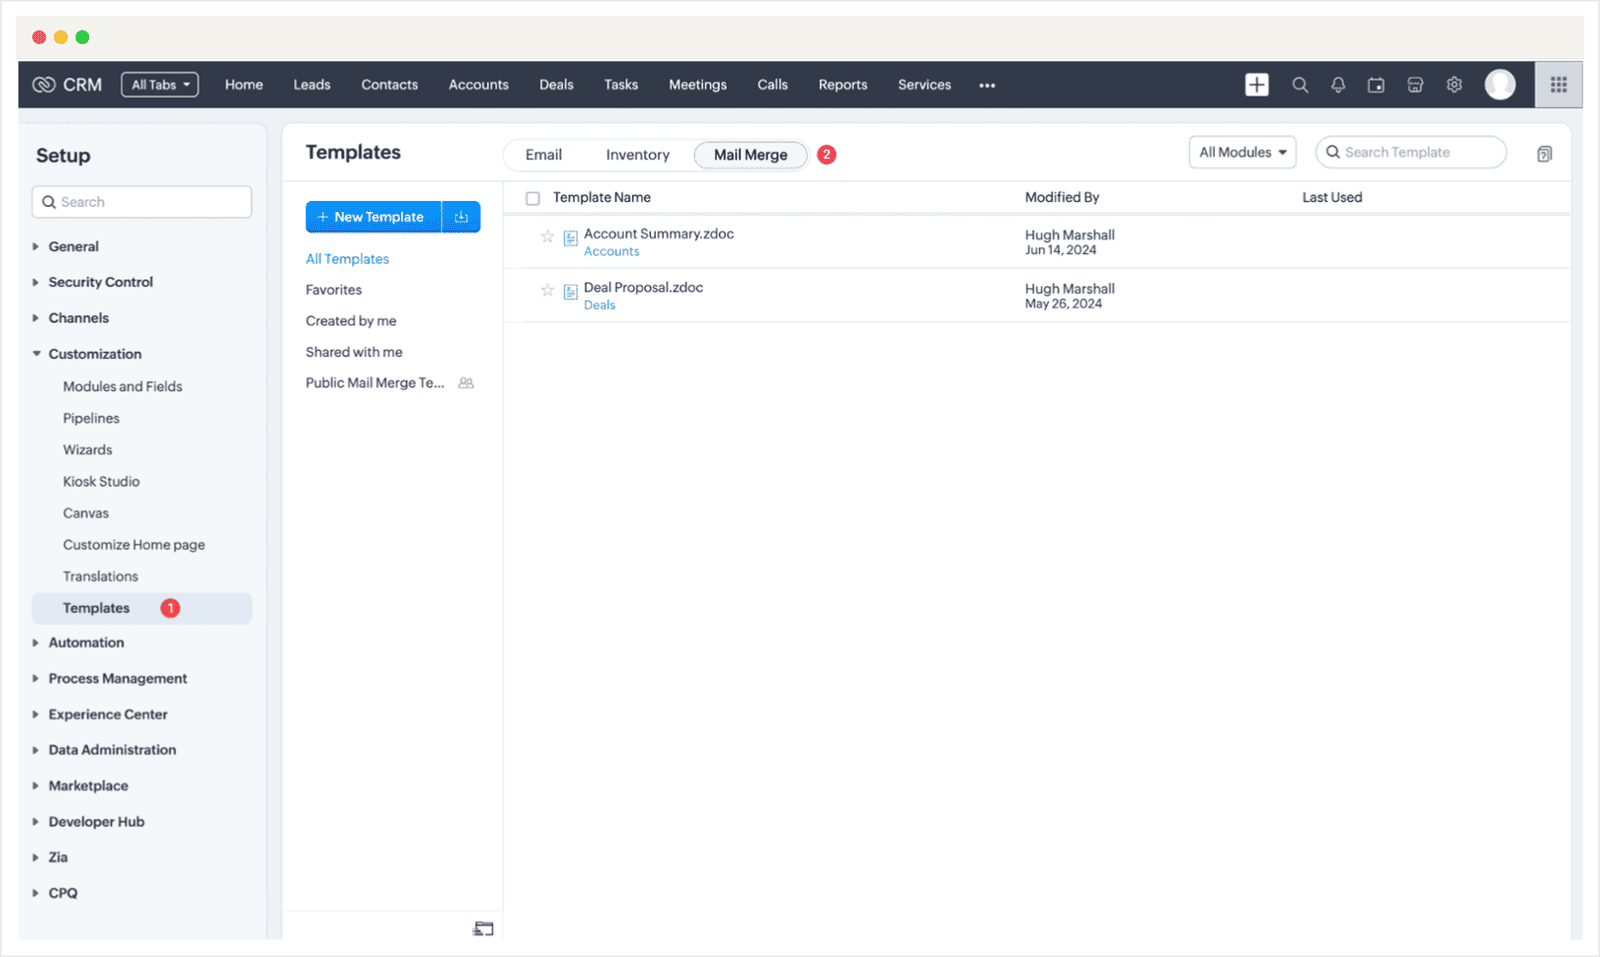
- Head to Settings > Customisation > Templates.
- Select the Mail Merge tab and ensure you have some mail merge templates ready to use.
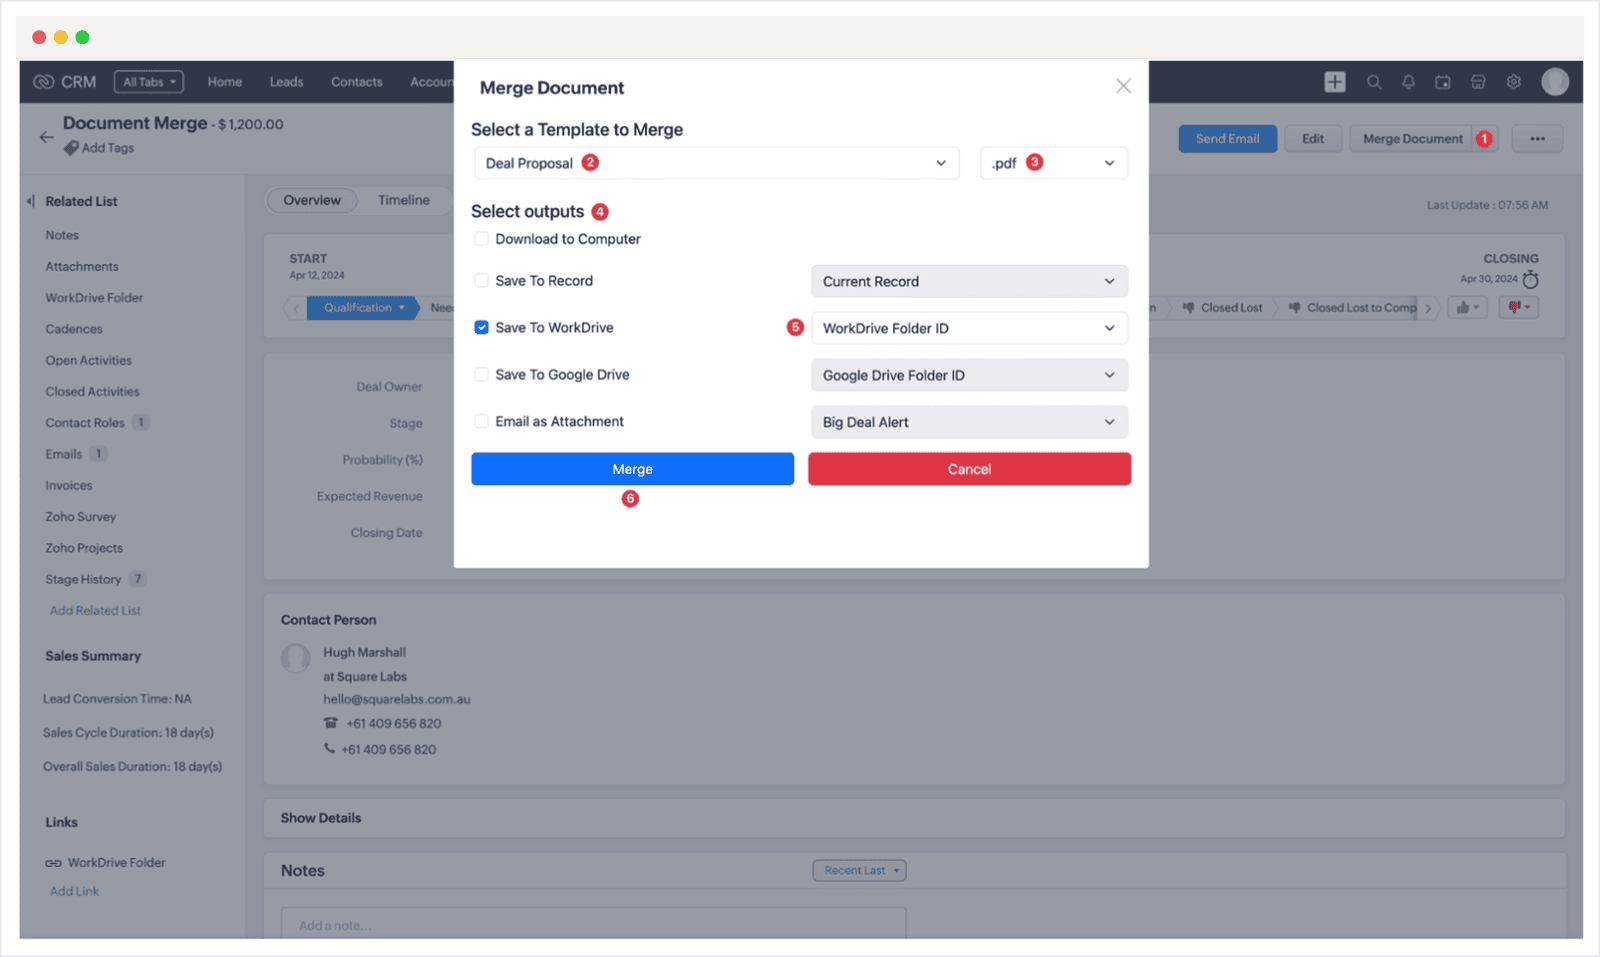
- Click the Merge Document Button to launch the widget.
- Select the mail merge template.
- Select the output format.
- Select your outputs. Only enabled outputs will appear and defaulted ones will be pre-selected.
- Select any additional output options.
- Click Merge to Start.
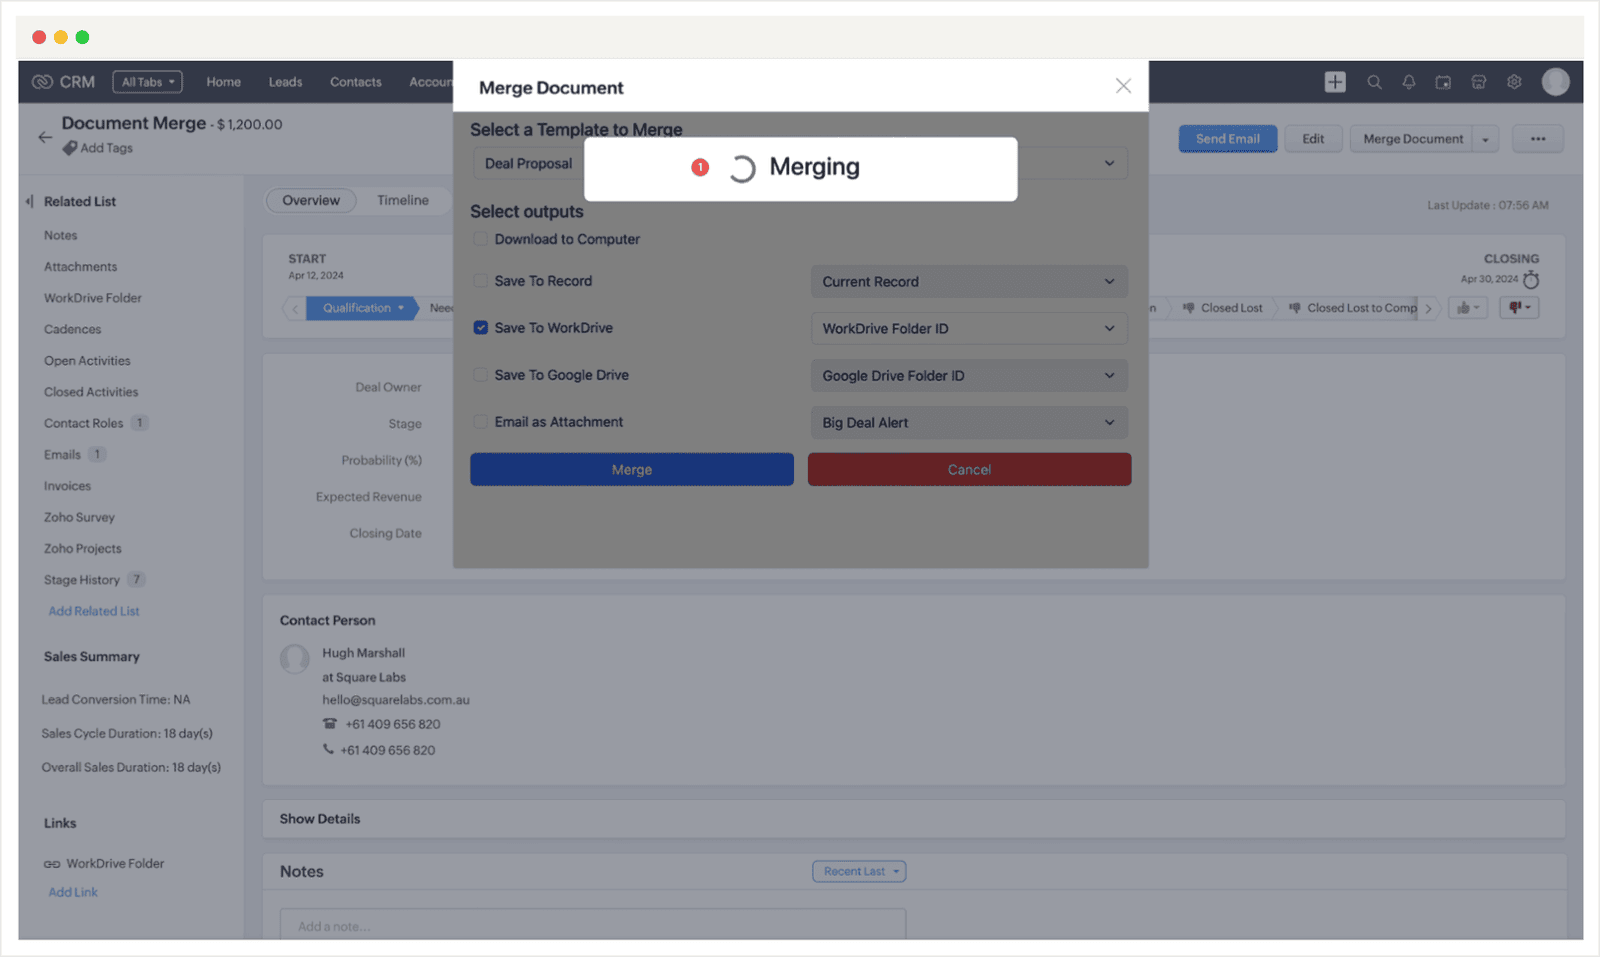
- A loading screen will appear. This will take approximately 5-10 Seconds depending on the complexity of your merge document.
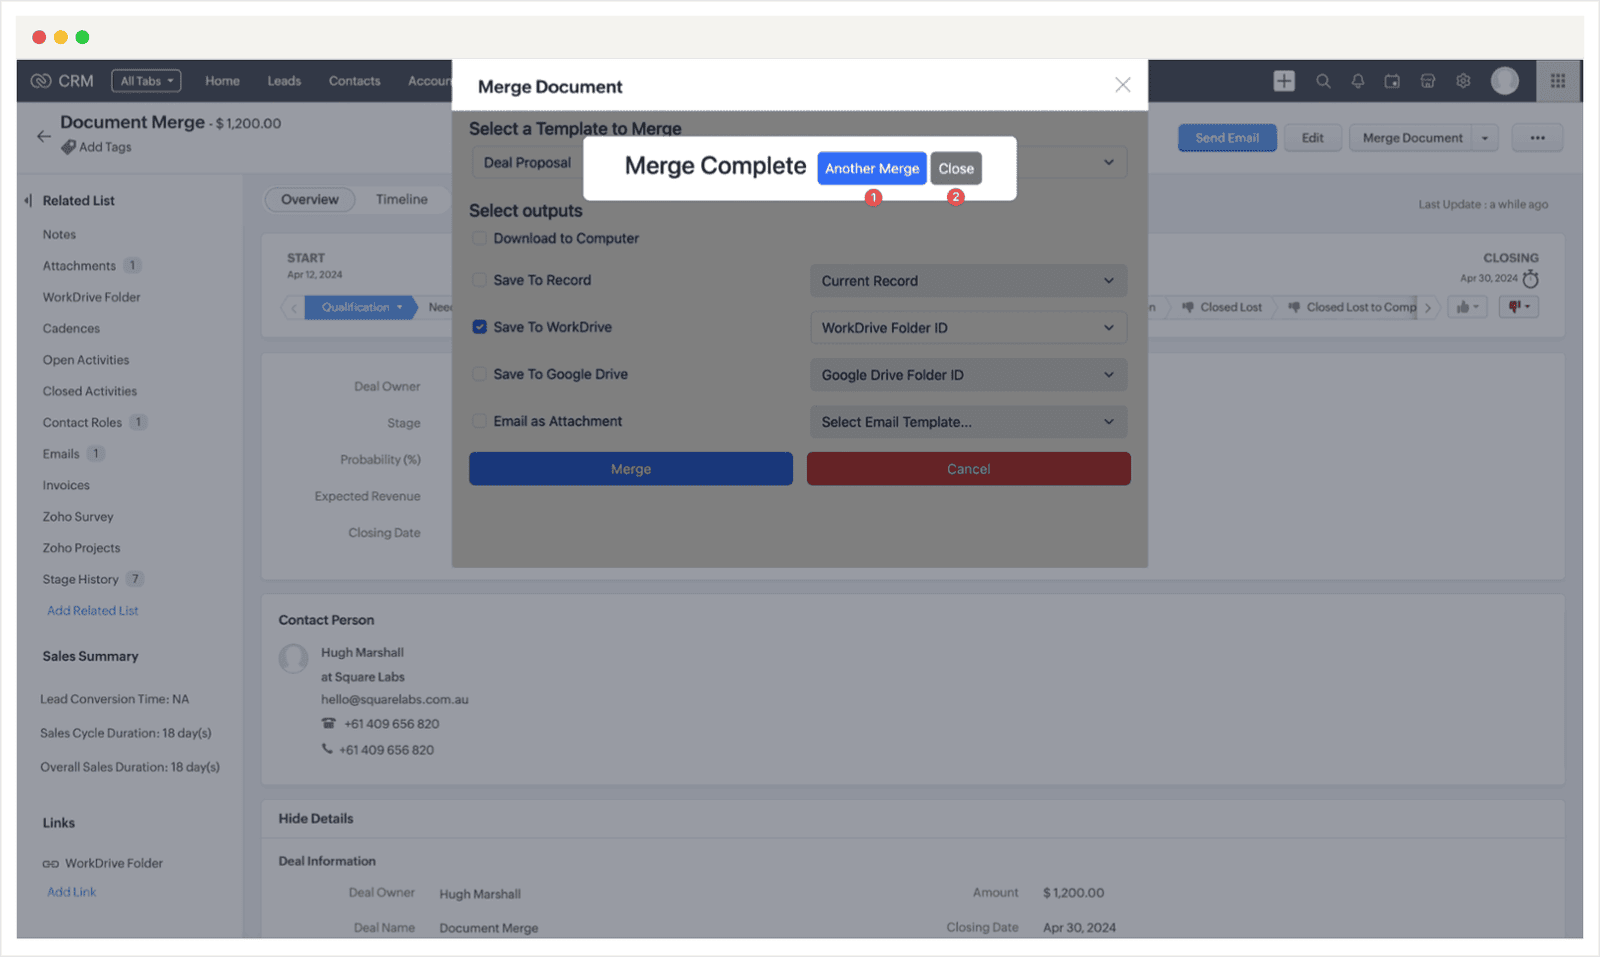
- Once the merge is complete you will have the option to run another merge.
- Clicking Close will close and refresh the record.
Workflow
Workflow Guide
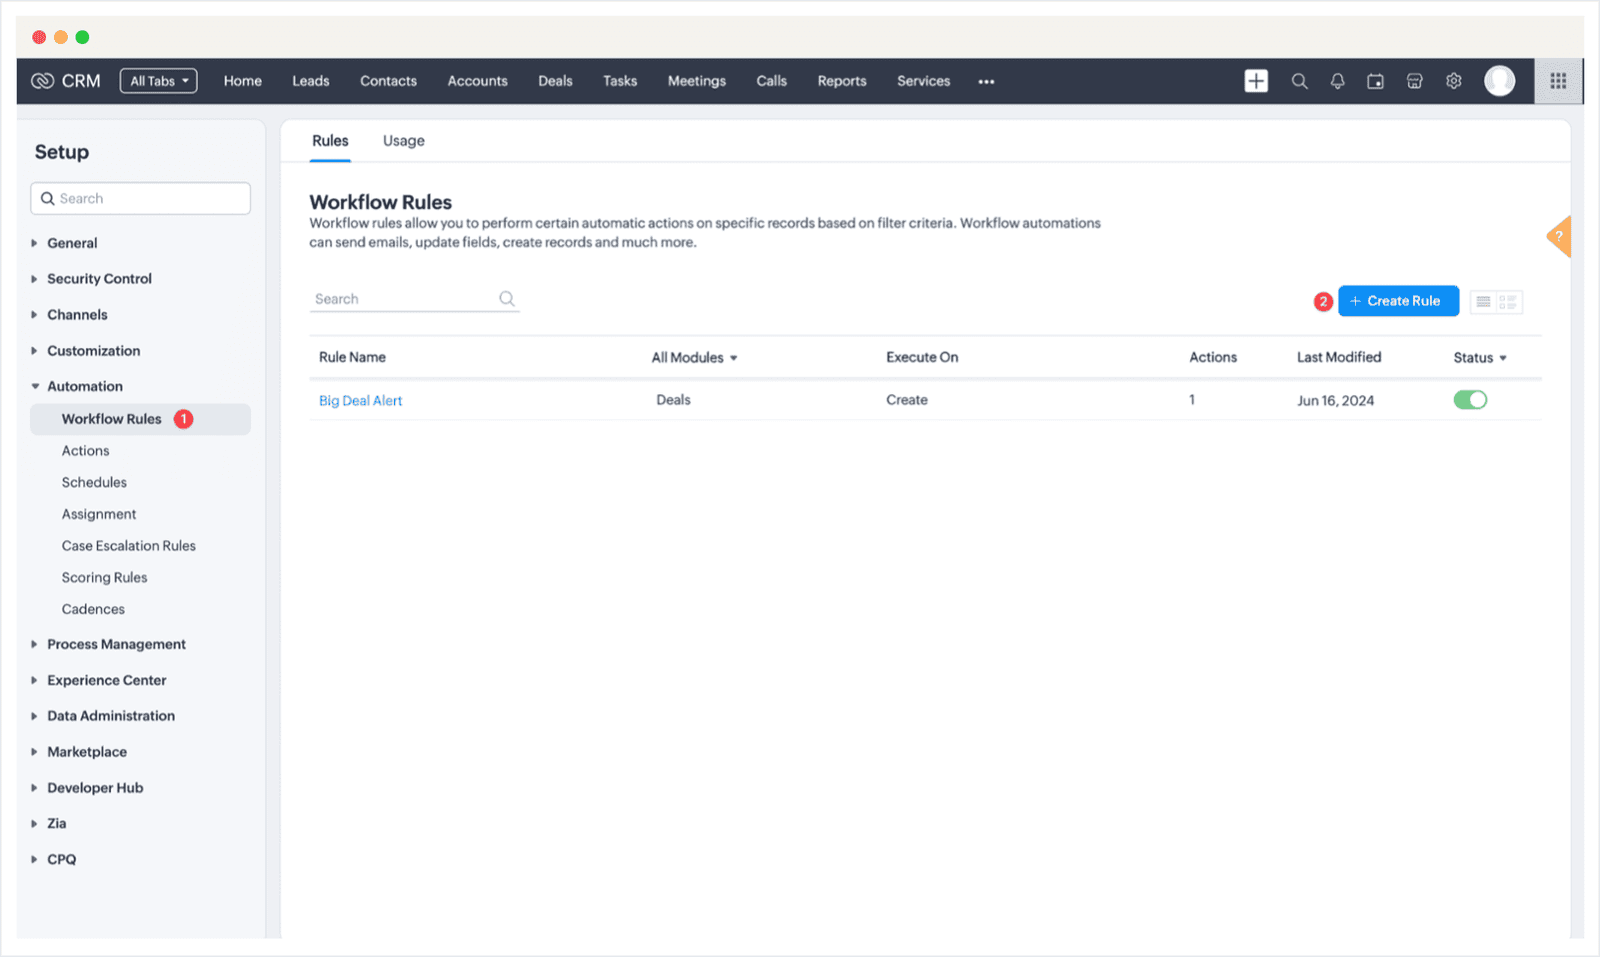
- Go to Settings > Automation > Workflow Rules.
- Click Create Rule.
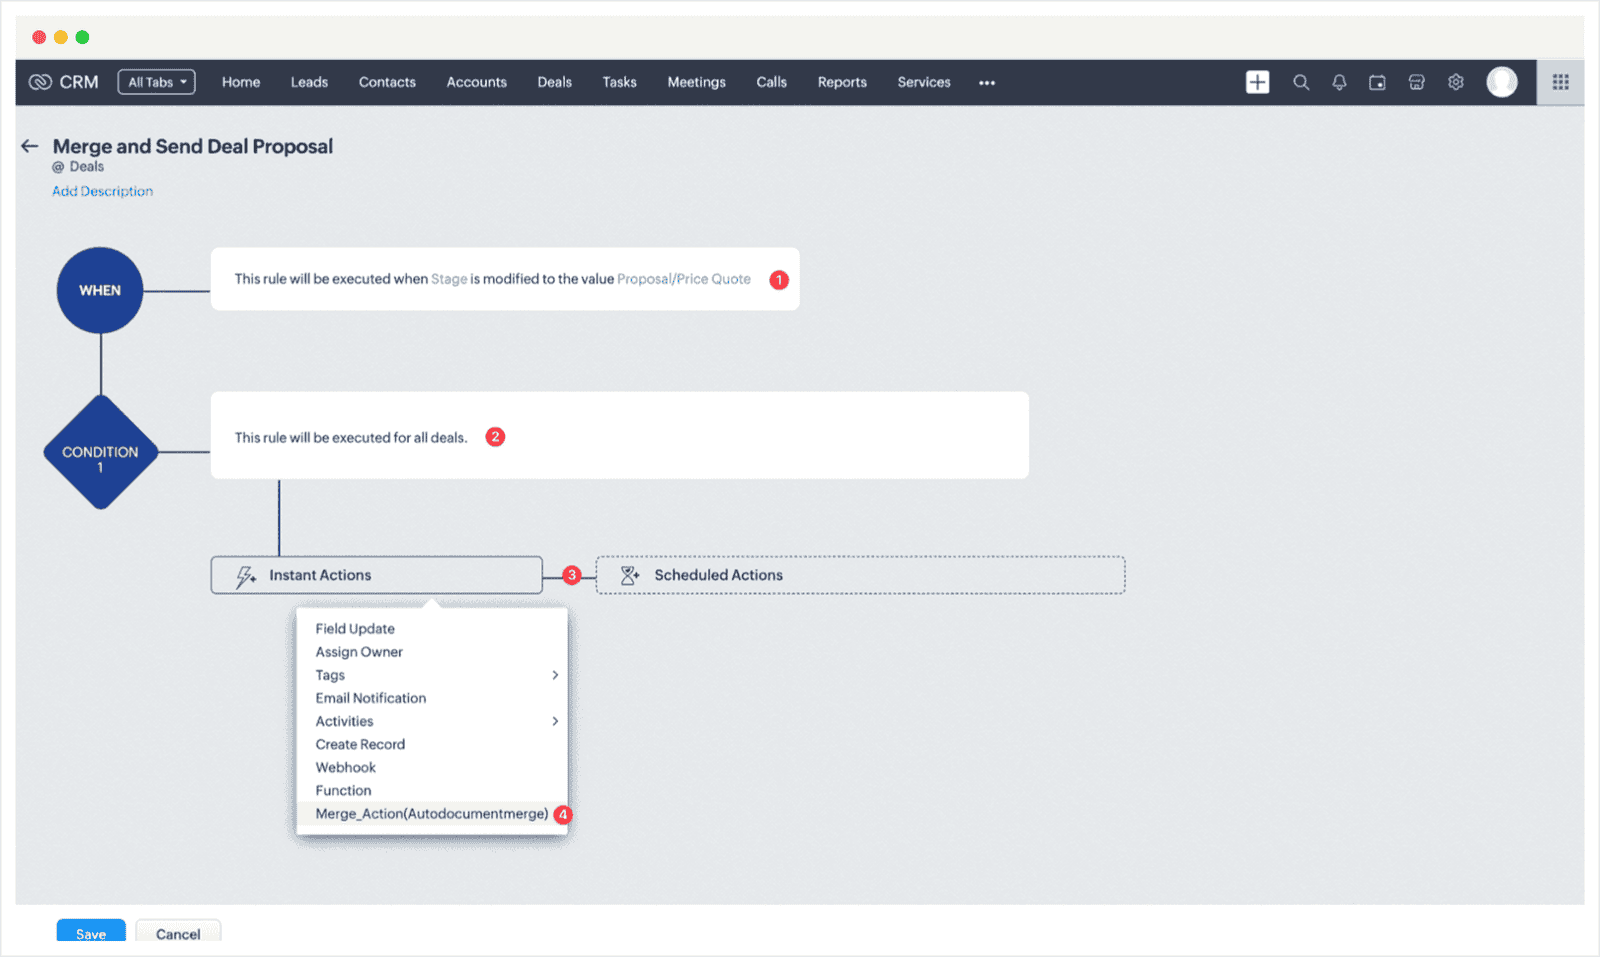
- Configure your workflow trigger
- Configure your Workflow Conditions
- Select Instant or Scheduled Action
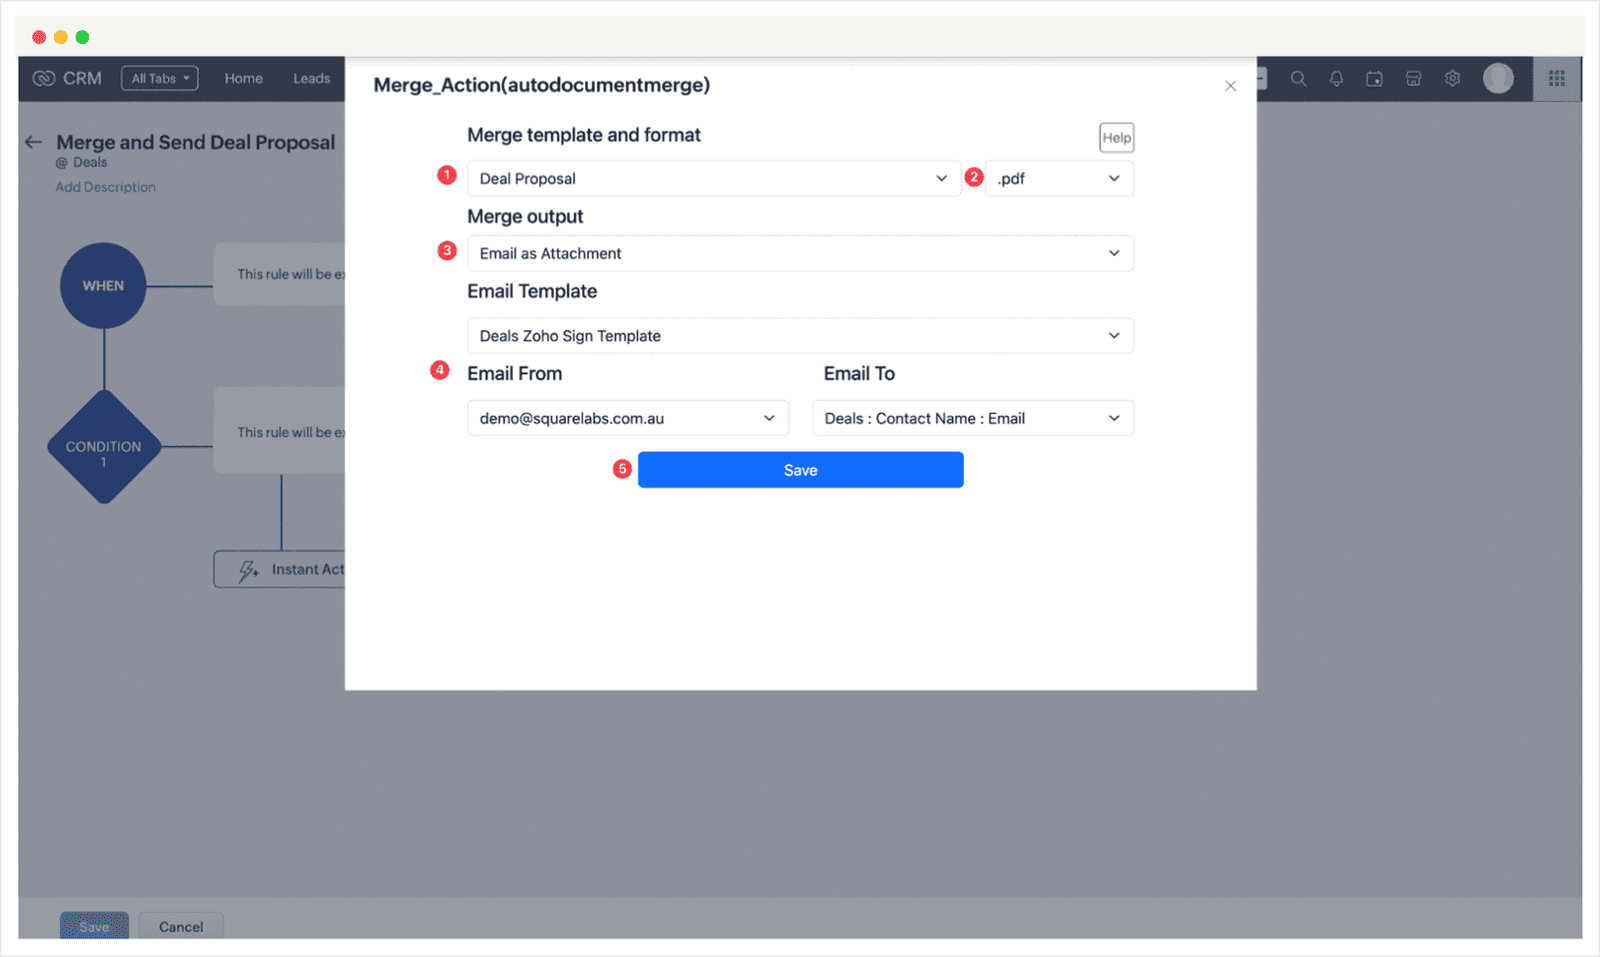
- Select Merge_Action* to configure a merge action attached to your workflow.
*If you have multiple Extensions installed this may be listed as 'Custom Actions'
- Select the Merge template.
- Select the Merge format.
- Select your Merge output.
- Populate the output specific settings.
- Click Save.
Custom Module
Custom Module Guide
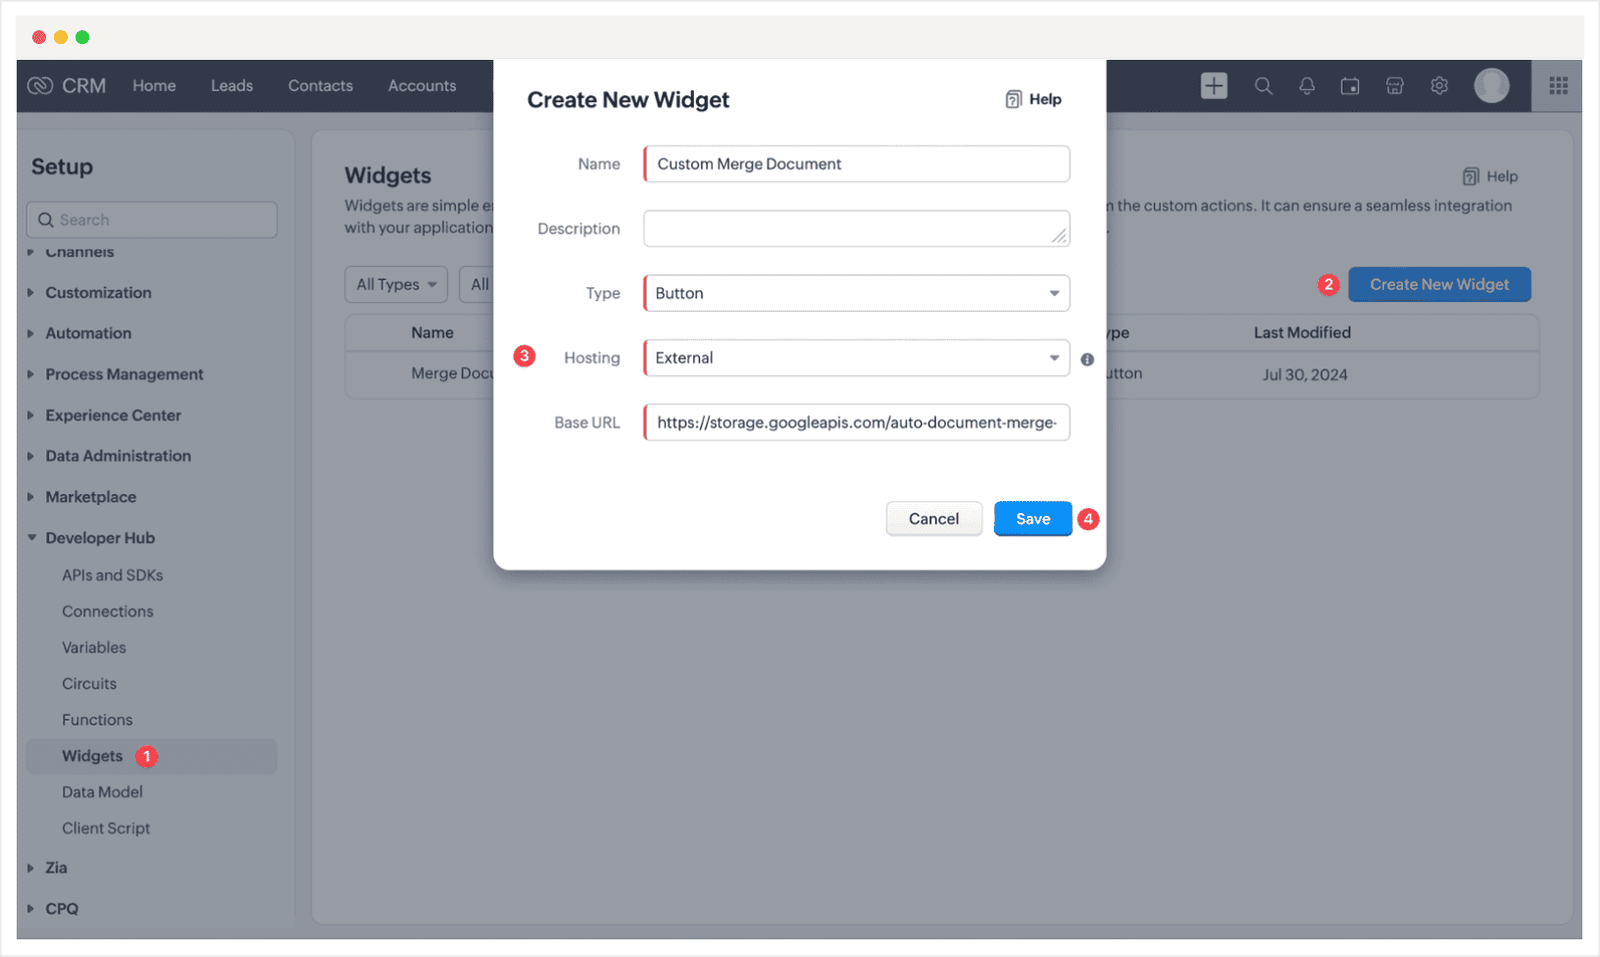
- Head to Settings > Customisation > Developer Hub > Widgets
- Click Create New Widget
- Complete the details ensuring the following:
- Type: Button
- Hosting: External
- Base URL:
- https://storage.googleapis.com/auto-document-merge-widget/v1.1/app/main/widget.html
- Click Save.
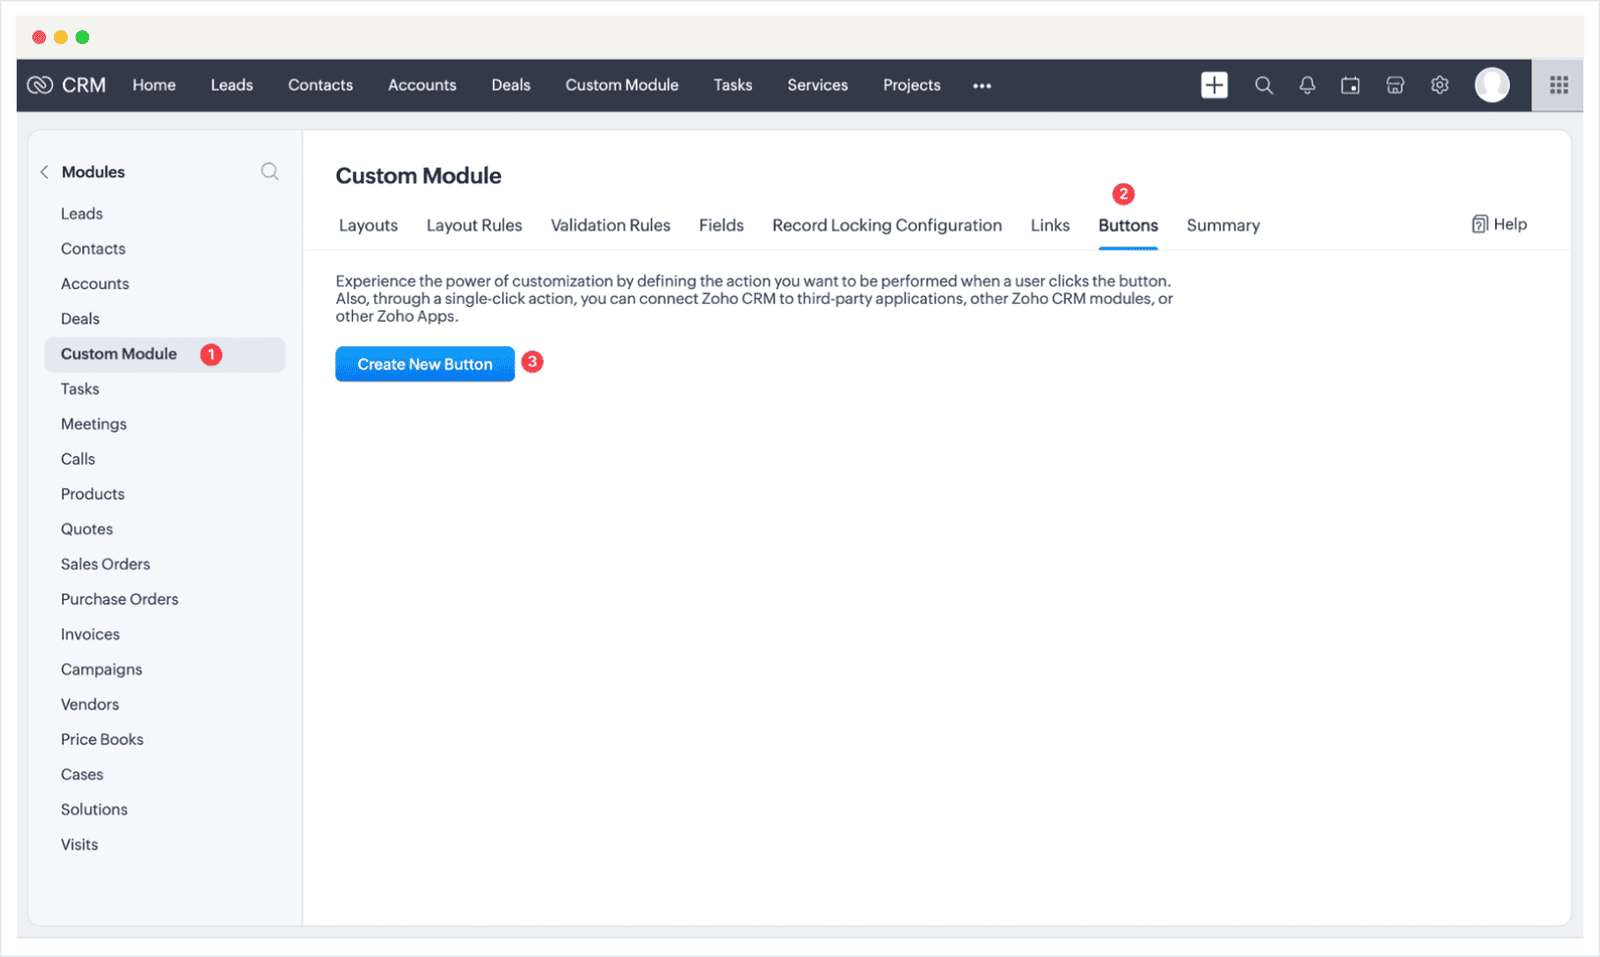
- Head to Settings > Customisation > Modules & Fields > Select your custom module.
- Click the Buttons Tab.
- Click Create New Button
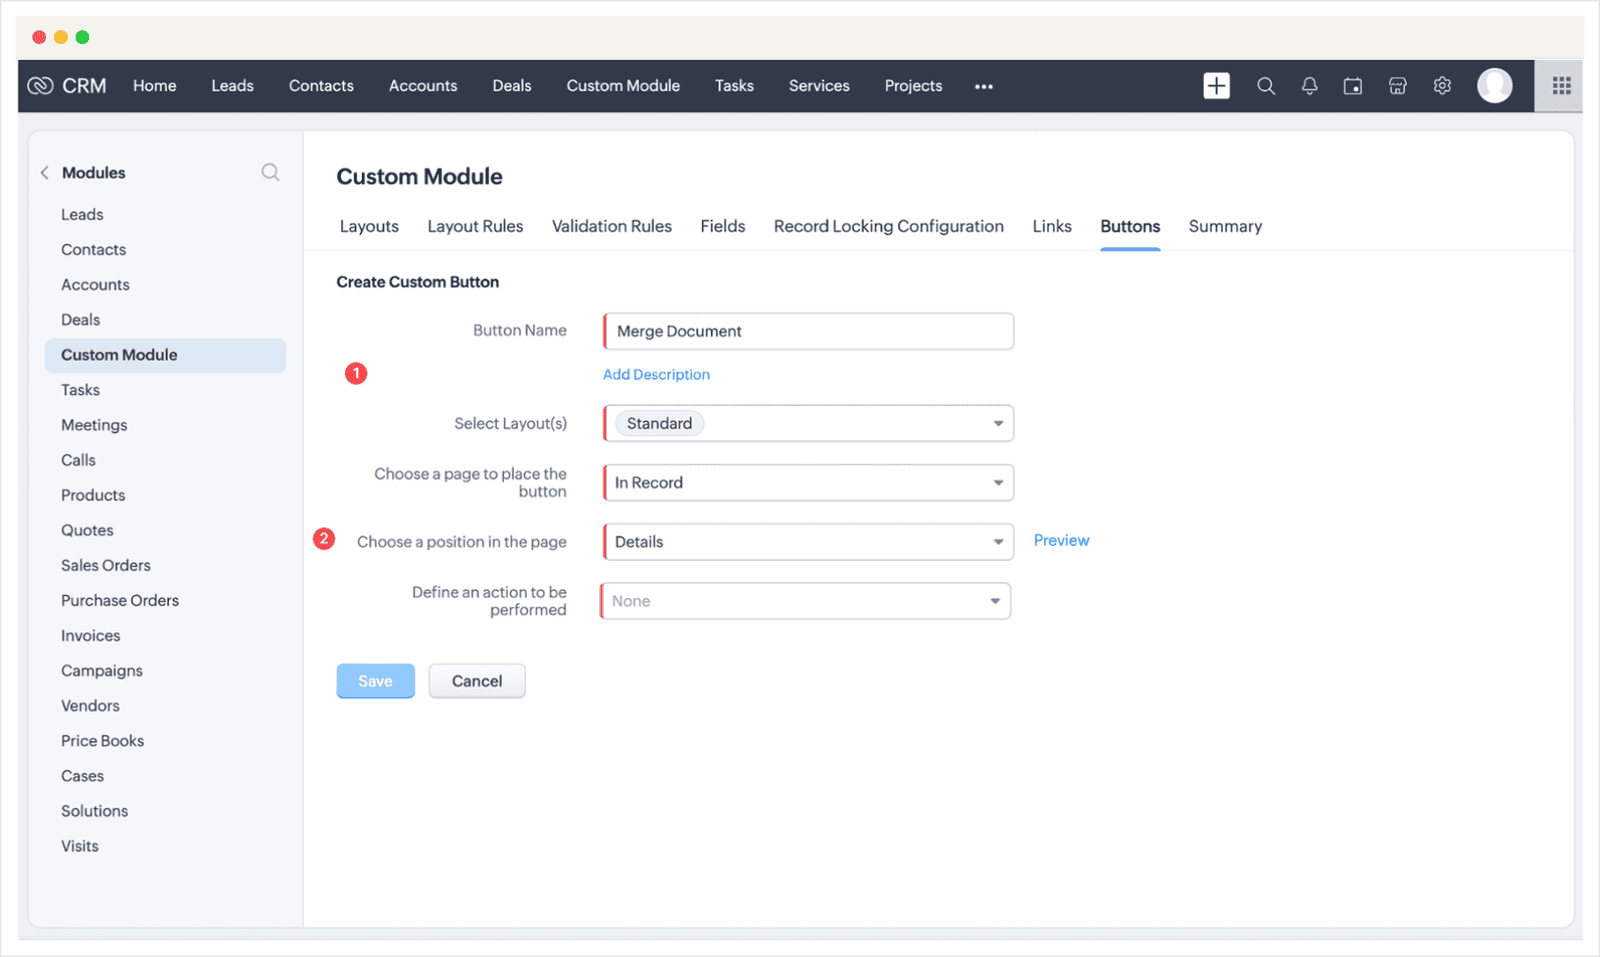
- Enter the Button Name, Layout and Profile Permissions
- Ensure you select the following: Button placement: In Record
Position: Details
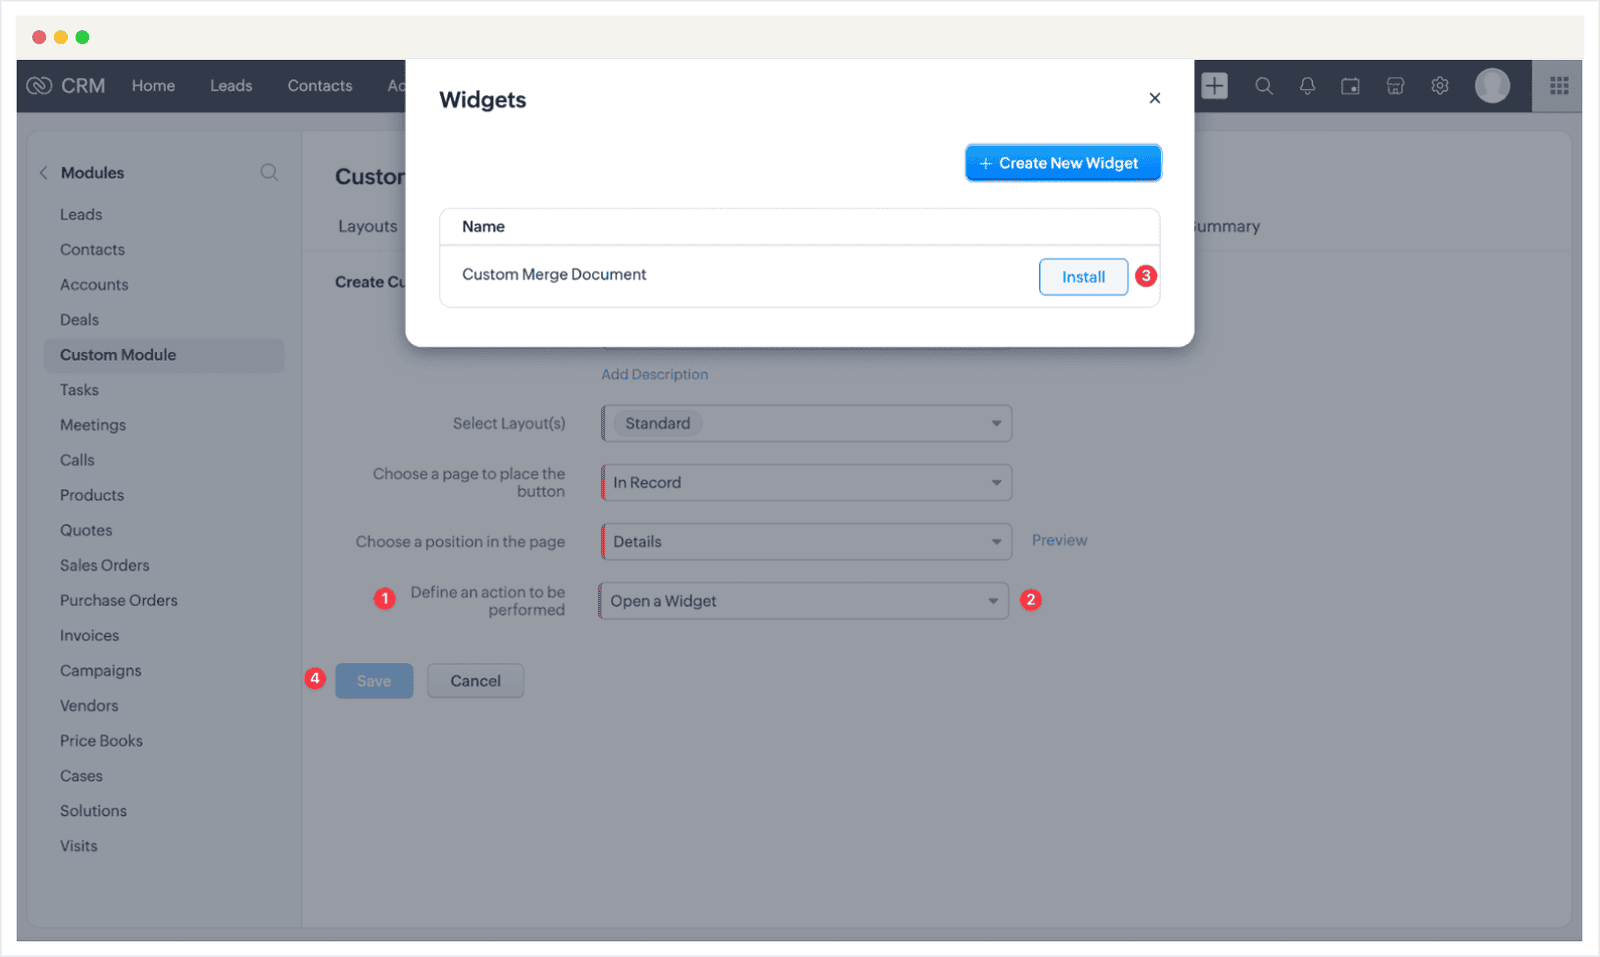
- Click Define and action to be performed.
- Select Open a Widget.
- Find the widget you created and click Install button.
- Click Save.